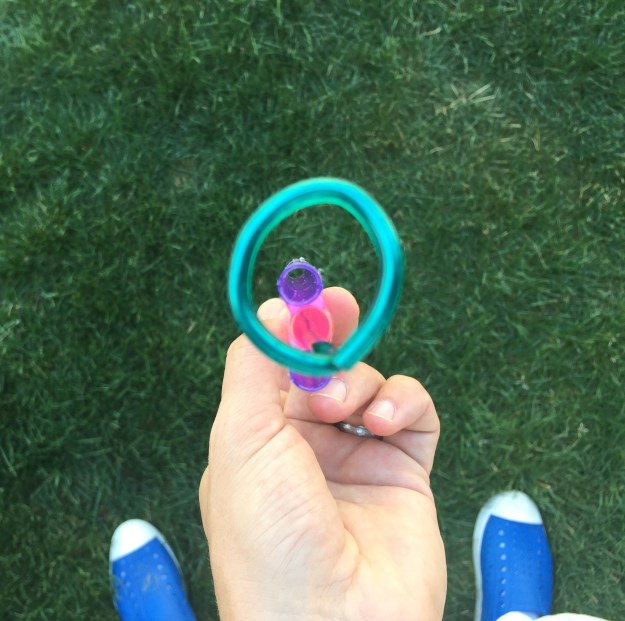
We’ve made bubble snakes before with empty water bottles, bubble solution, and rags, but that was child’s play. This time we went really big! This could be an actual world record! This was a discarded music video idea for a song called “Snake Charmer” that we ended up not needing. I still wanted to make a massive bubble snake, though!
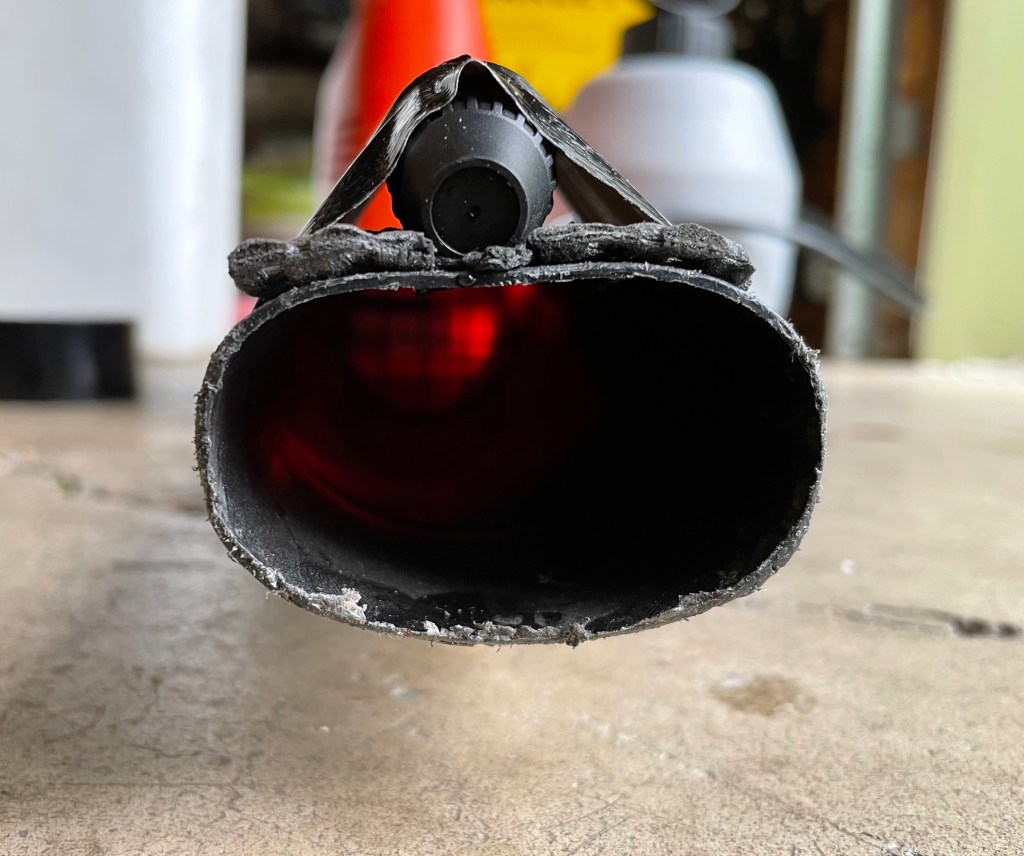
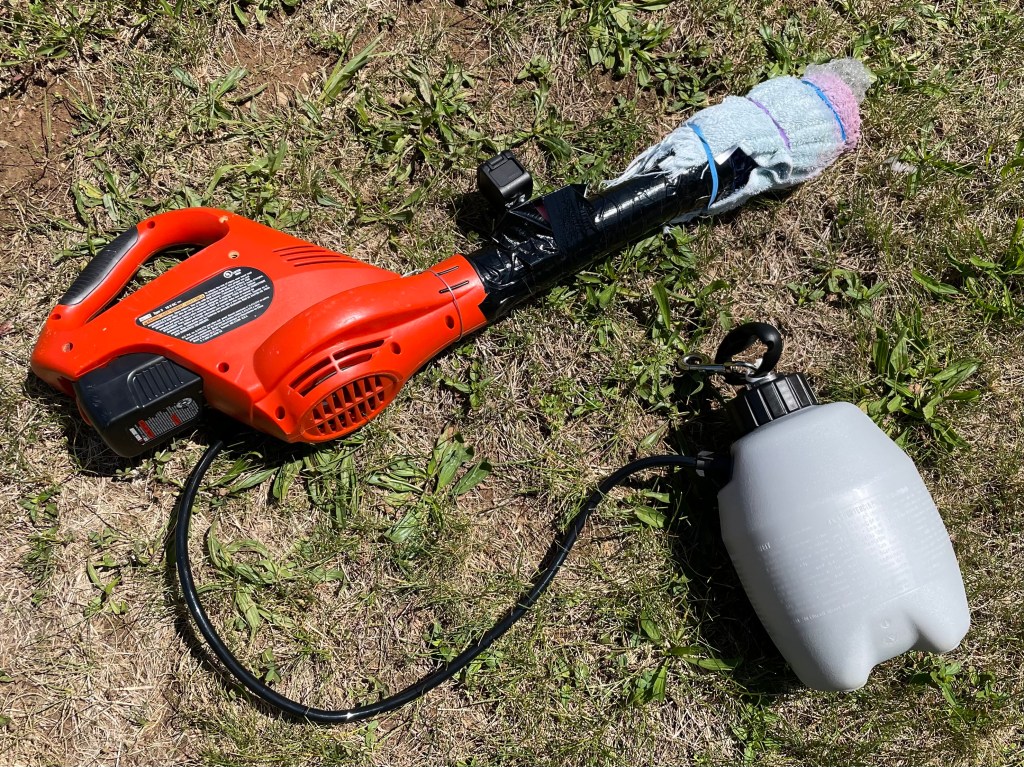
The two main problems I needed to solve in order to supersize the bubble snake was to produce more air than my puny lungs could provide, and to keep a steady stream of bubble solution pumping in.
I used my old Black and Decker electric leaf blower as an air supply, and a pump sprayer from Lowe’s to hold the bubble solution. I attached the pump sprayer to the leaf blower with duct tape and some wire.
I cut a plastic bottle and used duct tape to attach it over the sprayer nozzle.
I tried several types of cloth and fabric over the end of the hose, but a small hand towel gave the best results. I secured it with rubber bands.
That’s it! It came together quick and worked like a charm!
Note that some bubble solutions, such as those using Dawn dish soap can harm grass, or may be harmful to pets. Do your own research and test out different solutions before attempting at your own risk!
If you enjoyed the soundtrack to this video, the song is called Snake Charmer, by a band that I’m in called The Very Fine Gentlemen. You can listen to it in full at Spotify, wherever you stream music, or see the official video here:
I recently started playing Hero Kids with my own little heros. Hero Kids is a role-playing game like D&D (Dungeons and Dragons), but much less complicated and geared towards kids. They love it!
I bought a bundle of Hero Kids downloadable adventures via DriveThruRPG.com. I like that you can print out pre-designed maps and paper miniatures for all of the adventures, making game prep very easy. Sometimes I’ll color the printouts to give them an extra bit of zing, though it isn’t necessary.
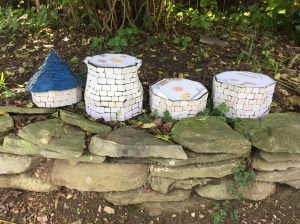
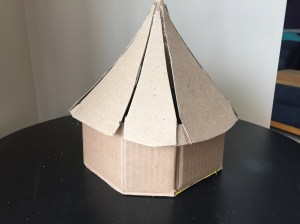
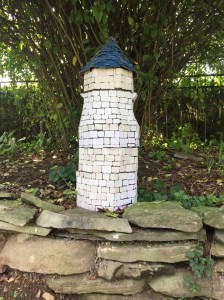
After having a few sessions under our belts, I decided to create something personalized to play on besides the printed maps. The Wizard’s Tower adventure features a tower with three floors, so I decided to make a 3D, modular tower with stackable parts, complete with a rickety roof.
It started as a simple idea, but as usual, I very quickly got carried away.
I used Amazon boxes and lots of hot glue to make the main structure. The pieces were sized and shaped to the printable playing mats of the tower floors.
Save those Amazon boxes!
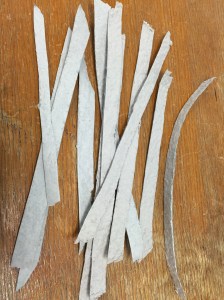
For the rickety roof, I used a cereal box, painted and cut up into small squares, and tiled over rafters comprised of heavily glued cardboard strips.
Painted cereal box for roof tiles.
My favorite part of this project was making the stone walls. I blended a sludge of water and newspaper, drained off most of the water, and baked it into thin sheets, using this really cool method found here. I then cut the sheets into stone blocks and glued them all over the box with Aleene’s Tacky Glue. This was the most time consuming part, but I really like the way the stone walls turned out.
Finally, I painted the printable playing mats in watercolor and glued them to the tower pieces. I still have some finishing touches to add, such as balcony doors, railings, a crooked chimney, and a grand staircase, but my kids (and I) were really eager to play, so I postponed some of these details so we could finally begin to battle our way up to the top of the tower. I do plan to add them later for use in other adventures. I’m thinking that my little players will be become caretakers of the tower while the wizard is off wizarding somewhere.
Keep in mind you don’t need any special props to run Hero Kids, just some standard six-sided dice and downloadable content at DriveThruRPG. If you or your kids want an easy entry into the world of tabletop RPGs, then stop what you’re doing, download some content, and start an adventure!
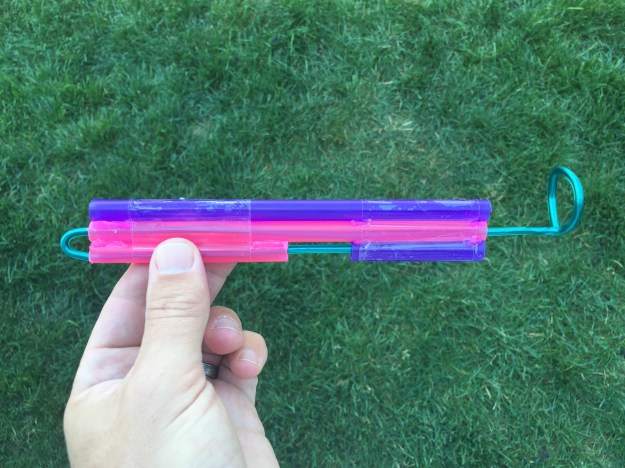
A kite messenger is a clever little device that slides up a kite string, releases a light payload, then slides back down to the bottom of the string for more fun. I made one with some cheap materials and finally found some windy days to test it out. Some kite messenger designs use sails to pull up the kite, but I’m starting out with a simpler design that uses toy parachutes to catch the wind. It can be made in just a few minutes using drinking straws, wire, tape, and a toy parachute.
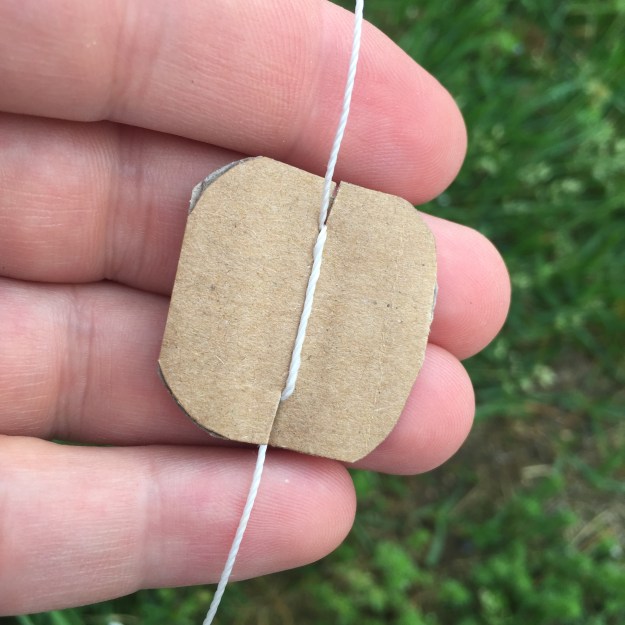
Here’s how it works: The front loop of the wire hits a simple cardboard bumper attached high up on the line. As the wire stops, the rest of the unit continues forward, opening the middle section where the parachute is held. Once the parachute releases, the messenger slides right back down towards the spool of string, ready to be reloaded for more fun.
It’s fun to see the kid’s excitement build as they watch the messenger climb up the string, eagerly awaiting the parachute’s release so they can chase it down.
Here is a tutorial on how to build your own kite messenger. I used replacement Tervis straws that I purchased at Bed, Bath, and Beyond, because they’re much sturdier than your average soda straw. To hold it all together I used packing tape as well as a bit of super glue for good measure. The climb to the top of the kite line seemed to take a little long, so my next modification will be to use a much lighter gauge wire to reduce the overall weight.
When I was scavenging cheap fabric at yard sales for homemade renaissance costumes, I picked up a tan curtain for fifty cents that never got used.
I’ve been on a roll and looking for any excuse to use my sewing machine, so I decided to turn the tacky thrifted curtain into a Jedi tunic for my son. If nothing else, it would give me some more sewing practice and would be a nice test run for an even better tunic down the road.
I took my little guy’s measurements and found detailed instructions at Jedi Assembly to draw up a tunic pattern. There really wasn’t much at stake here, which helped me shrug off my usual perfectionist traits and just throw the thing together without too much fuss.
I can definitely see what I need to do better. The collar should be thicker and the fit was too tight in the sleeves and armpit. Also, our dog chewed up the drawstrings before I could sew them on, so there’s that.
It wasn’t me.
For watching Star Wars and playing light saber at home, however, I think it will get the job done. Using some scrap fabric to do mock-ups before using expensive fabric is a really great idea for novice sewers like me.
The only downside to the whole project is that my little guy may someday find himself in the window treatment department of JCPenney’s, experiencing a strange nostalgic attachment towards a particular set of tan curtains (cue Star Wars main theme music).
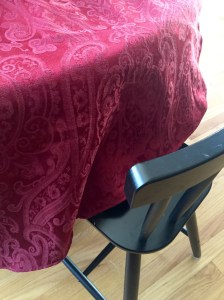
Like most of my projects, I got in over my head. It started with a large, fancy tablecloth, probably discarded from a hotel or restaurant, and an ornate pillow sham, both of which I found for 50% off at a thrift store. As soon as I set eyes upon them, I began to imagine the potential. Our renaissance faire trip was quickly approaching, and that fancy tablecloth could make a great cape for my daughter, and the pillow sham could surely be transferred into something “knightly” for my son.
Fancy Tablecloth
Fancy pillow sham
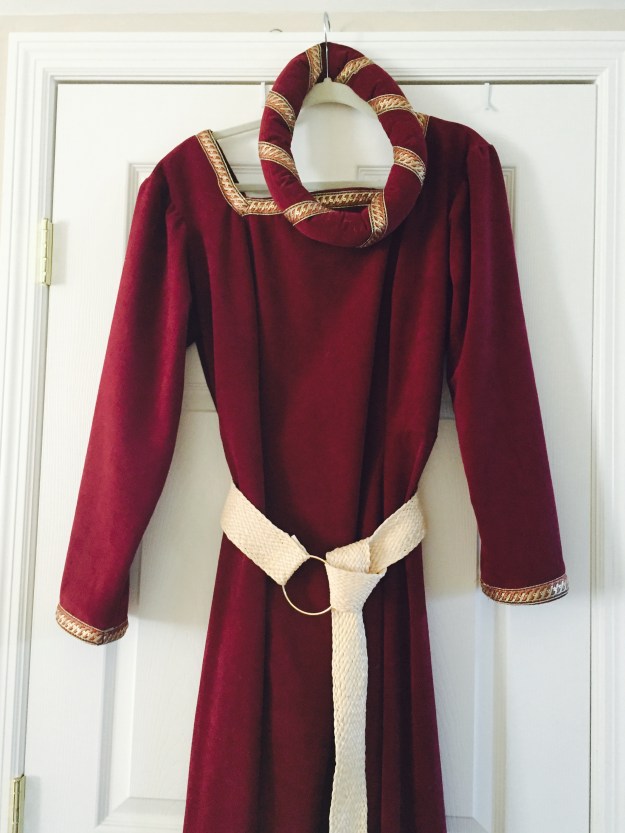
I sat down with my mother-in-law for some brief sewing machine tutorials before lugging her machine home and jumping into my new sewing project. I found a girl’s cape pattern and went to town. Sewing a cape is pretty straightforward and turned out to be a great first project to gain some initial sewing experience. While I made a few mistakes on the cape, it was really exciting to have sewn something from scratch, and I was ready to take on the pillow sham next. First I stared at it. Then I stared at it some more. After finally coming up with a strategy, I removed all of the trim and separated the front, back, and extra linings with a seam ripper. Then I sewed the front and back together, leaving room for the arms and neck. I reattached some of the extra trim to make a collar. I was really happy with the result. Who knew a fancy pillow case or sham could be transformed into a knight’s tunic?
I discovered that costuming is like eating chips–once you start you just can’t stop. Of course, now my son needed a cape, too. We scoured some more thrift shops and yard sales, and hit the fabric jackpot! I also scored a few old McCall’s renaissance patterns, which I would use to make a gown for my wife.
The boy’s cape pattern was actually the easiest of all pieces to assemble. For the finishing touches, I used a decorative chain and buttons from a craft store.
Then came the gown. I came very close to giving up on it. For starters, I had to draft the pattern because I didn’t have the right size. Then I cut some pieces out backwards and didn’t have enough material to cut new pattern pieces. Fortunately, I chalked it up as a learning experience and tried fixing it instead of giving up. I made several creative patches that would make Frankenstein proud, and in the end, it all turned out ok. I learned a lot while making the gown, like using interfacing for support, and attaching zippers and sleeves. At first these were overwhelming obstacles that stretched my sewing abilities and knowledge, but once accomplished, it was all extremely rewarding and worth the invested time.
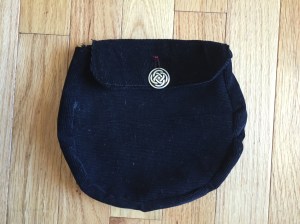
Like I said, once you start, it’s hard to stop, so I took some old corduroy pants and made the kids some belt pouches to be stuffed with snacks and trinkets for a long day at the faire.
Renaissance faire costumes can be costly, but with some creativity, some salvaged materials, and a sewing machine, you can create some cool garb for next to nothing and learn a lot throughout the process. Maybe those old curtains or pillow cases will someday adorn a King or Queen!
I really wanted to learn card tricks when I was a kid. I had already envisioned the look on my audience’s faces as I performed mystifying feats right before their eyes. Of course, it never worked out. I felt completely frustrated and intimidated trying to work out my first card tricks with a confusing paperback magic book. Without access to good information, it was all just over my head. Ultimately, I abandoned cards, but I still made up my own silly magic tricks. I learned to rely heavily on humor, since my magical effects were so terrible. My style was much more Pee-wee Herman than Pen and Teller. I just liked making people laugh and smile.
I started dabbling with magic again over these last few years and have had a much better go of it. Still feeling the sting of card magic failure from my younger days, I’ve opted to work primarily with coins. I carry a silver dollar in my pocket and have gotten fairly adept at palming and vanishing coins.
Regardless of my success with coins, I’ve still been shy about working with cards, until now. Mark Frauenfelder, author or Maker Dad, has a great new eBook called Trick Decks: How to Hack Playing Cards for Extraordinary Magic. After reading through the book, I’m super excited to finally tackle cards again!
Mark walks you through how to make five different trick decks. The directions are detailed, very easy to follow, and include plenty of pictures. He even offers multiple methods and materials for making them. While it’s more a deck making guide than a magic trick book, it does get you started with a unique trick using each one of the decks, and offers additional resources for exploring more tricks. You can also view some instructional resource videos on the companion website, http://www.trickdecks.org/.
If you’re interested in card tricks and love making things yourself, definitely check out Trick Decks!
Last year we made a Halloween Zombie Graveyard Cake. While I’m not sure that we’ll make one again this year, one thing I would change is the grass. Instead of using green icing for the grass, I’d use coconut flakes dyed with green food coloring. I think it would look much better and taste great, too!
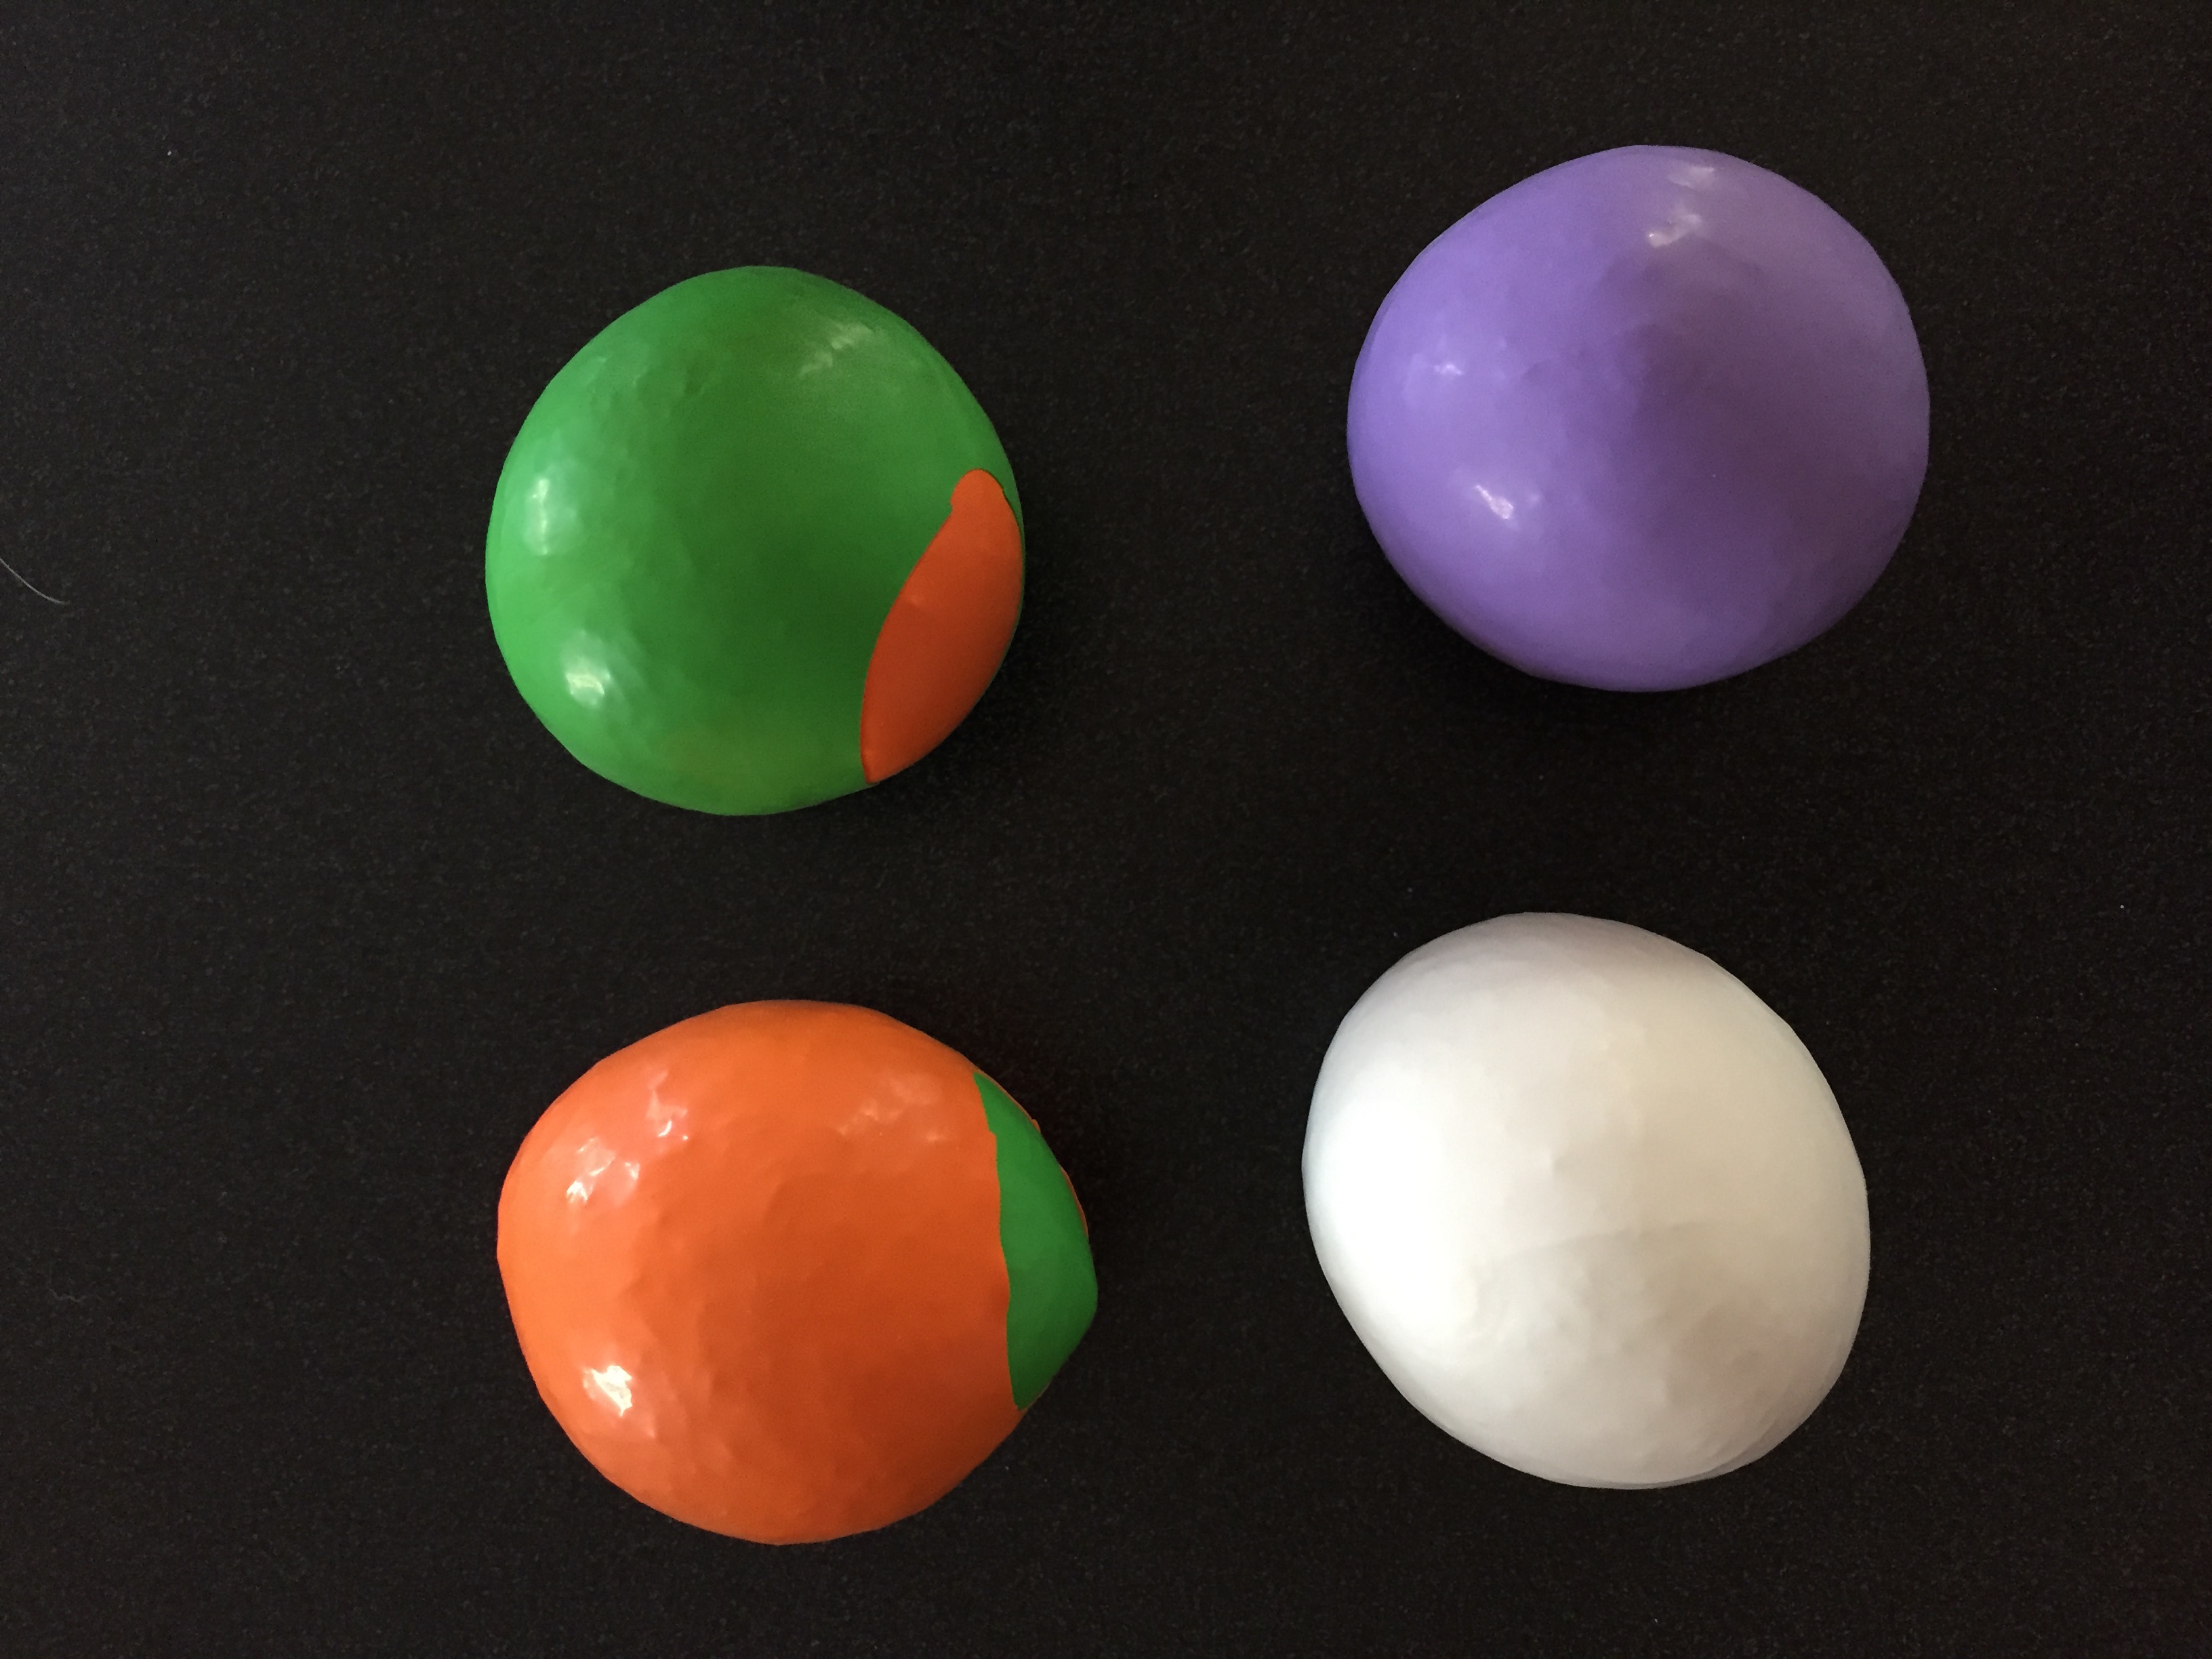
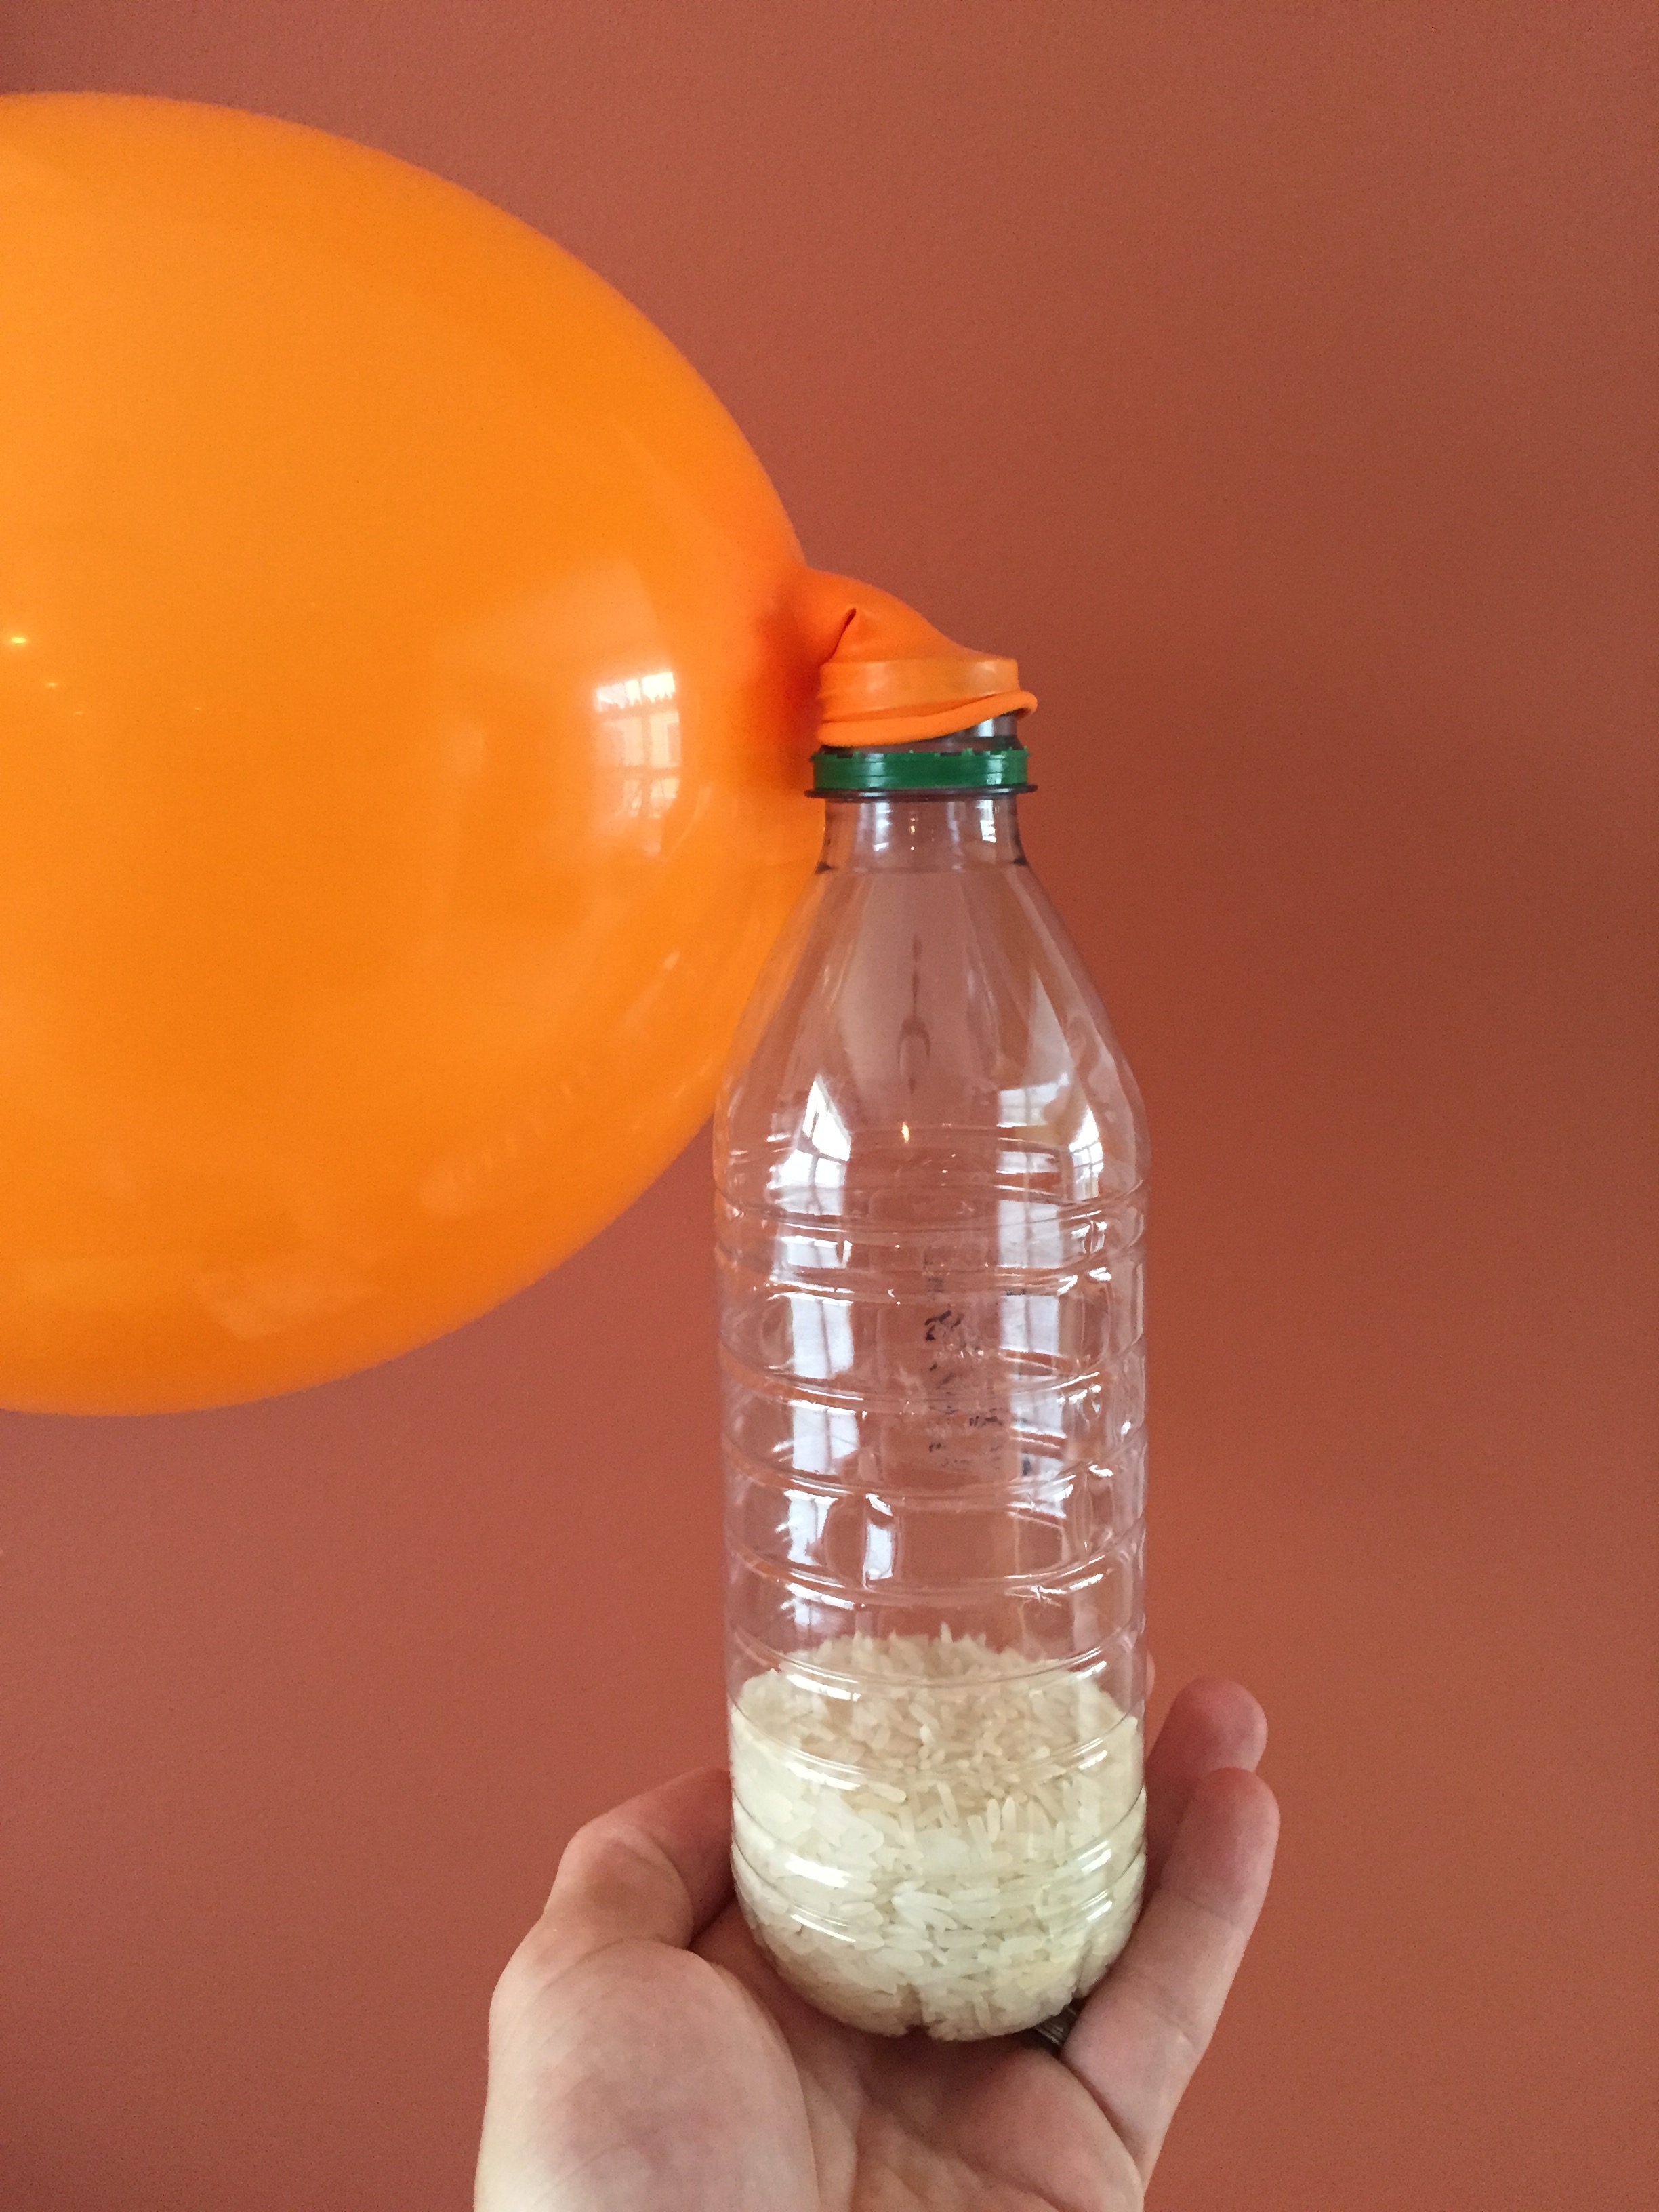
My kids are finally taking an interest in learning how to juggle. They’ve always loved throwing balls around whenever I practice, but they’ve never been interested in practicing the proper techniques until now. The problem is, my favorite juggling balls, the MMX Plus, are too heavy and large for their tiny hands. Instead of buying smaller balls or hacky sacks, I used plans from juggler.org to make several kid-friendly balls. This worked perfectly because I wanted to practice with them while their interest and excitement was high, and together we were able to crank out several balls in about 15 minutes. All you need to make your own juggling balls are balloons, tape, an empty water or soda bottle, and some filler (bird seed, sand, or rice). We used rice and the balls turned out great. Ok, kids, time to practice!
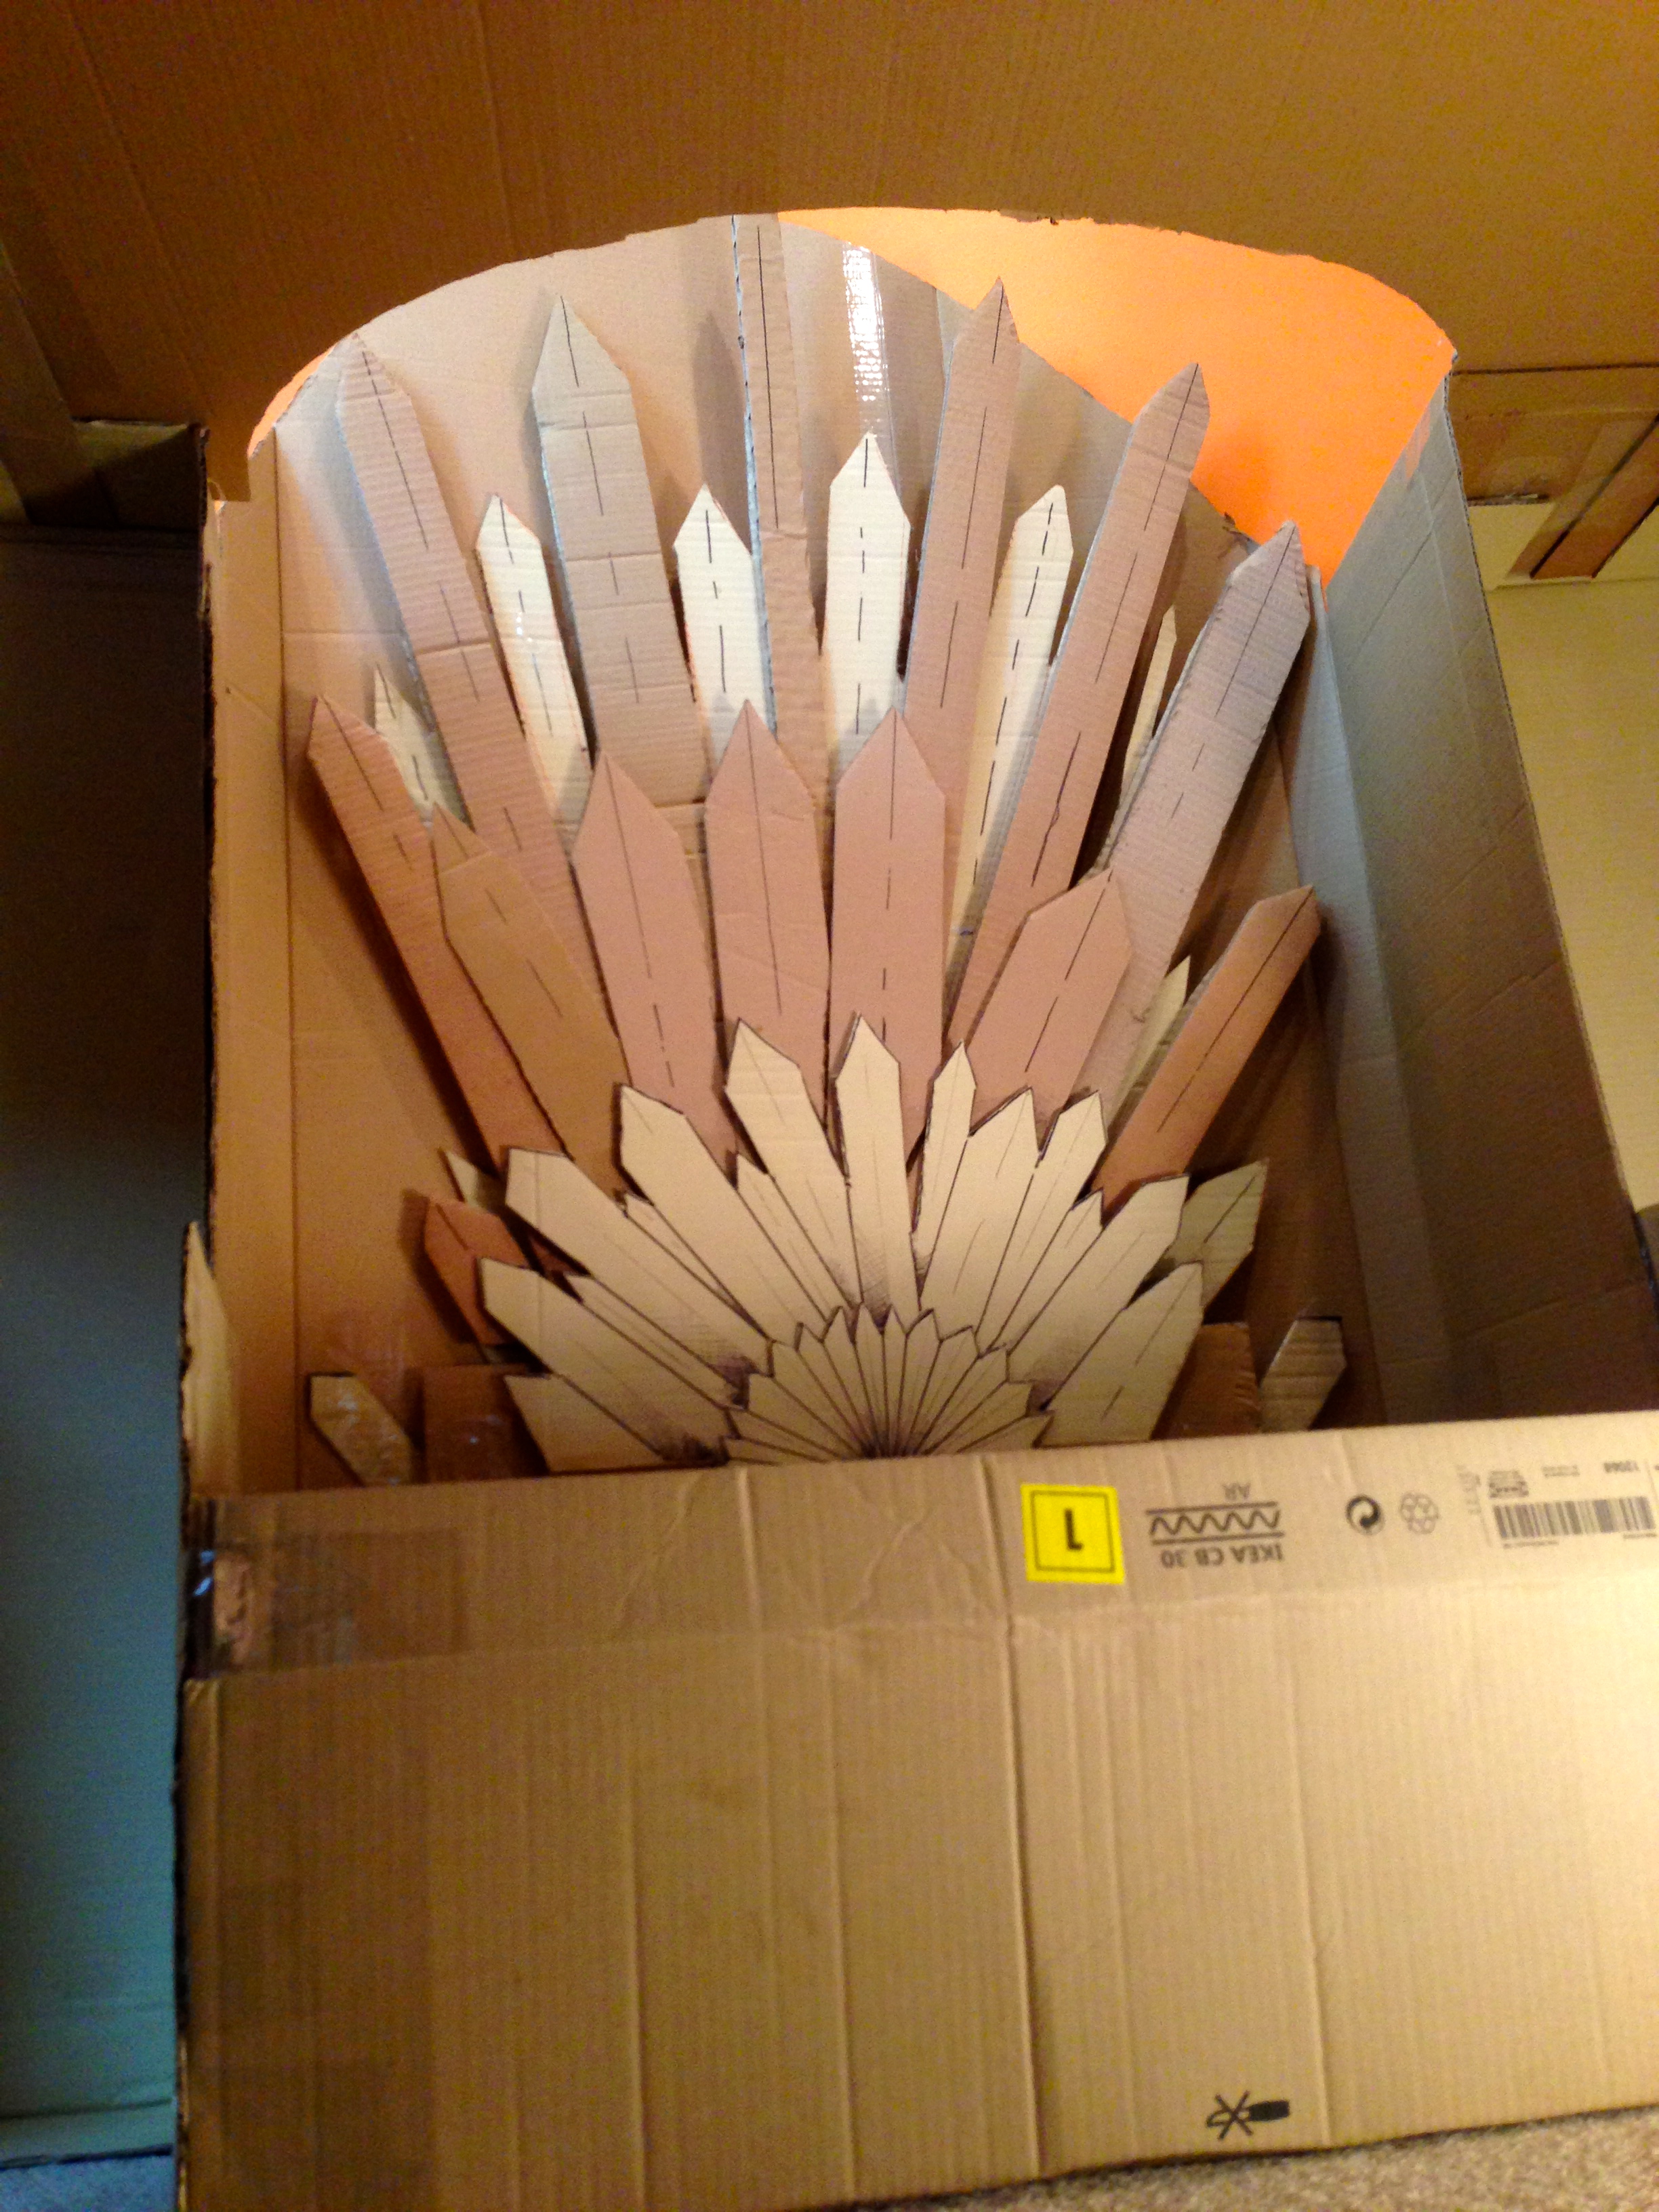
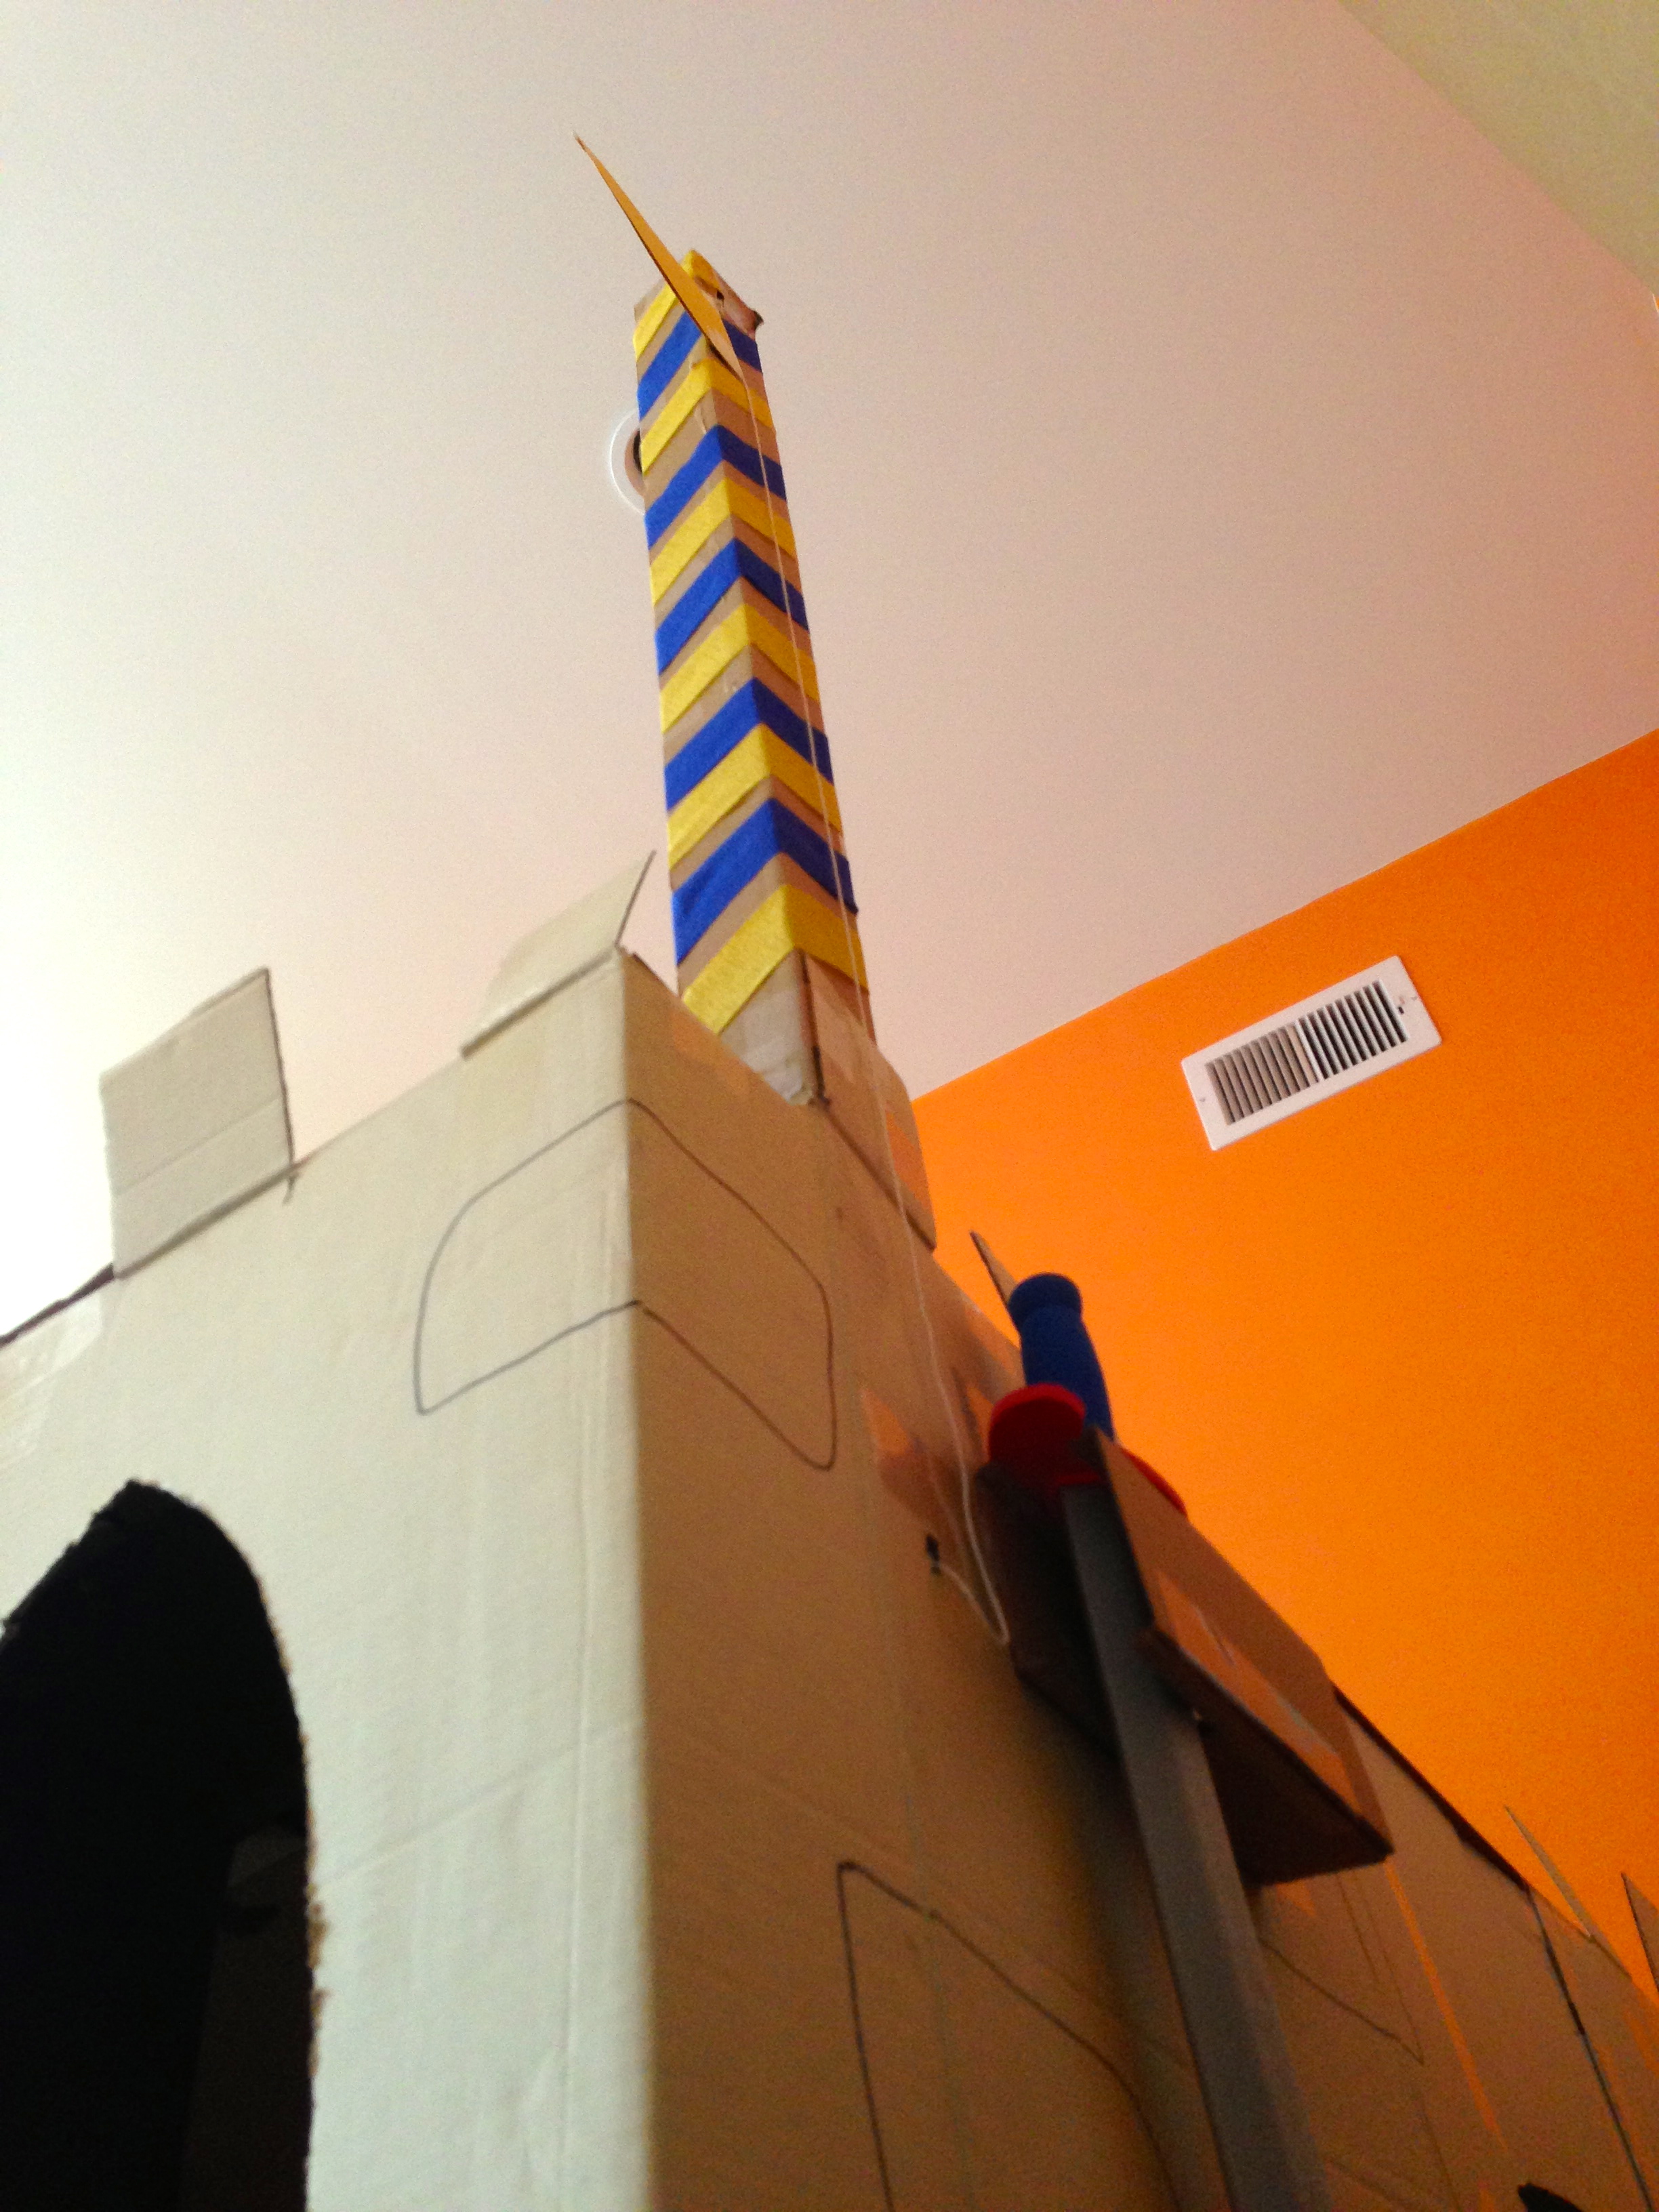
Five kings kids. One Throne. In celebration of HBO’s fifth season of Game of Thrones, I’m reposting some pictures of the cardboard keep, complete with ironcardboard throne. Unfortunately, the cardboard keep no longer stands. We eventually had to reclaim our playroom floor space. The cardboard was repurposed as a Dalek costume.
Game of Thrones returns to HBO on April 12th at 9PM. While you’re waiting, check out Sesame Street: Game of Chairs.
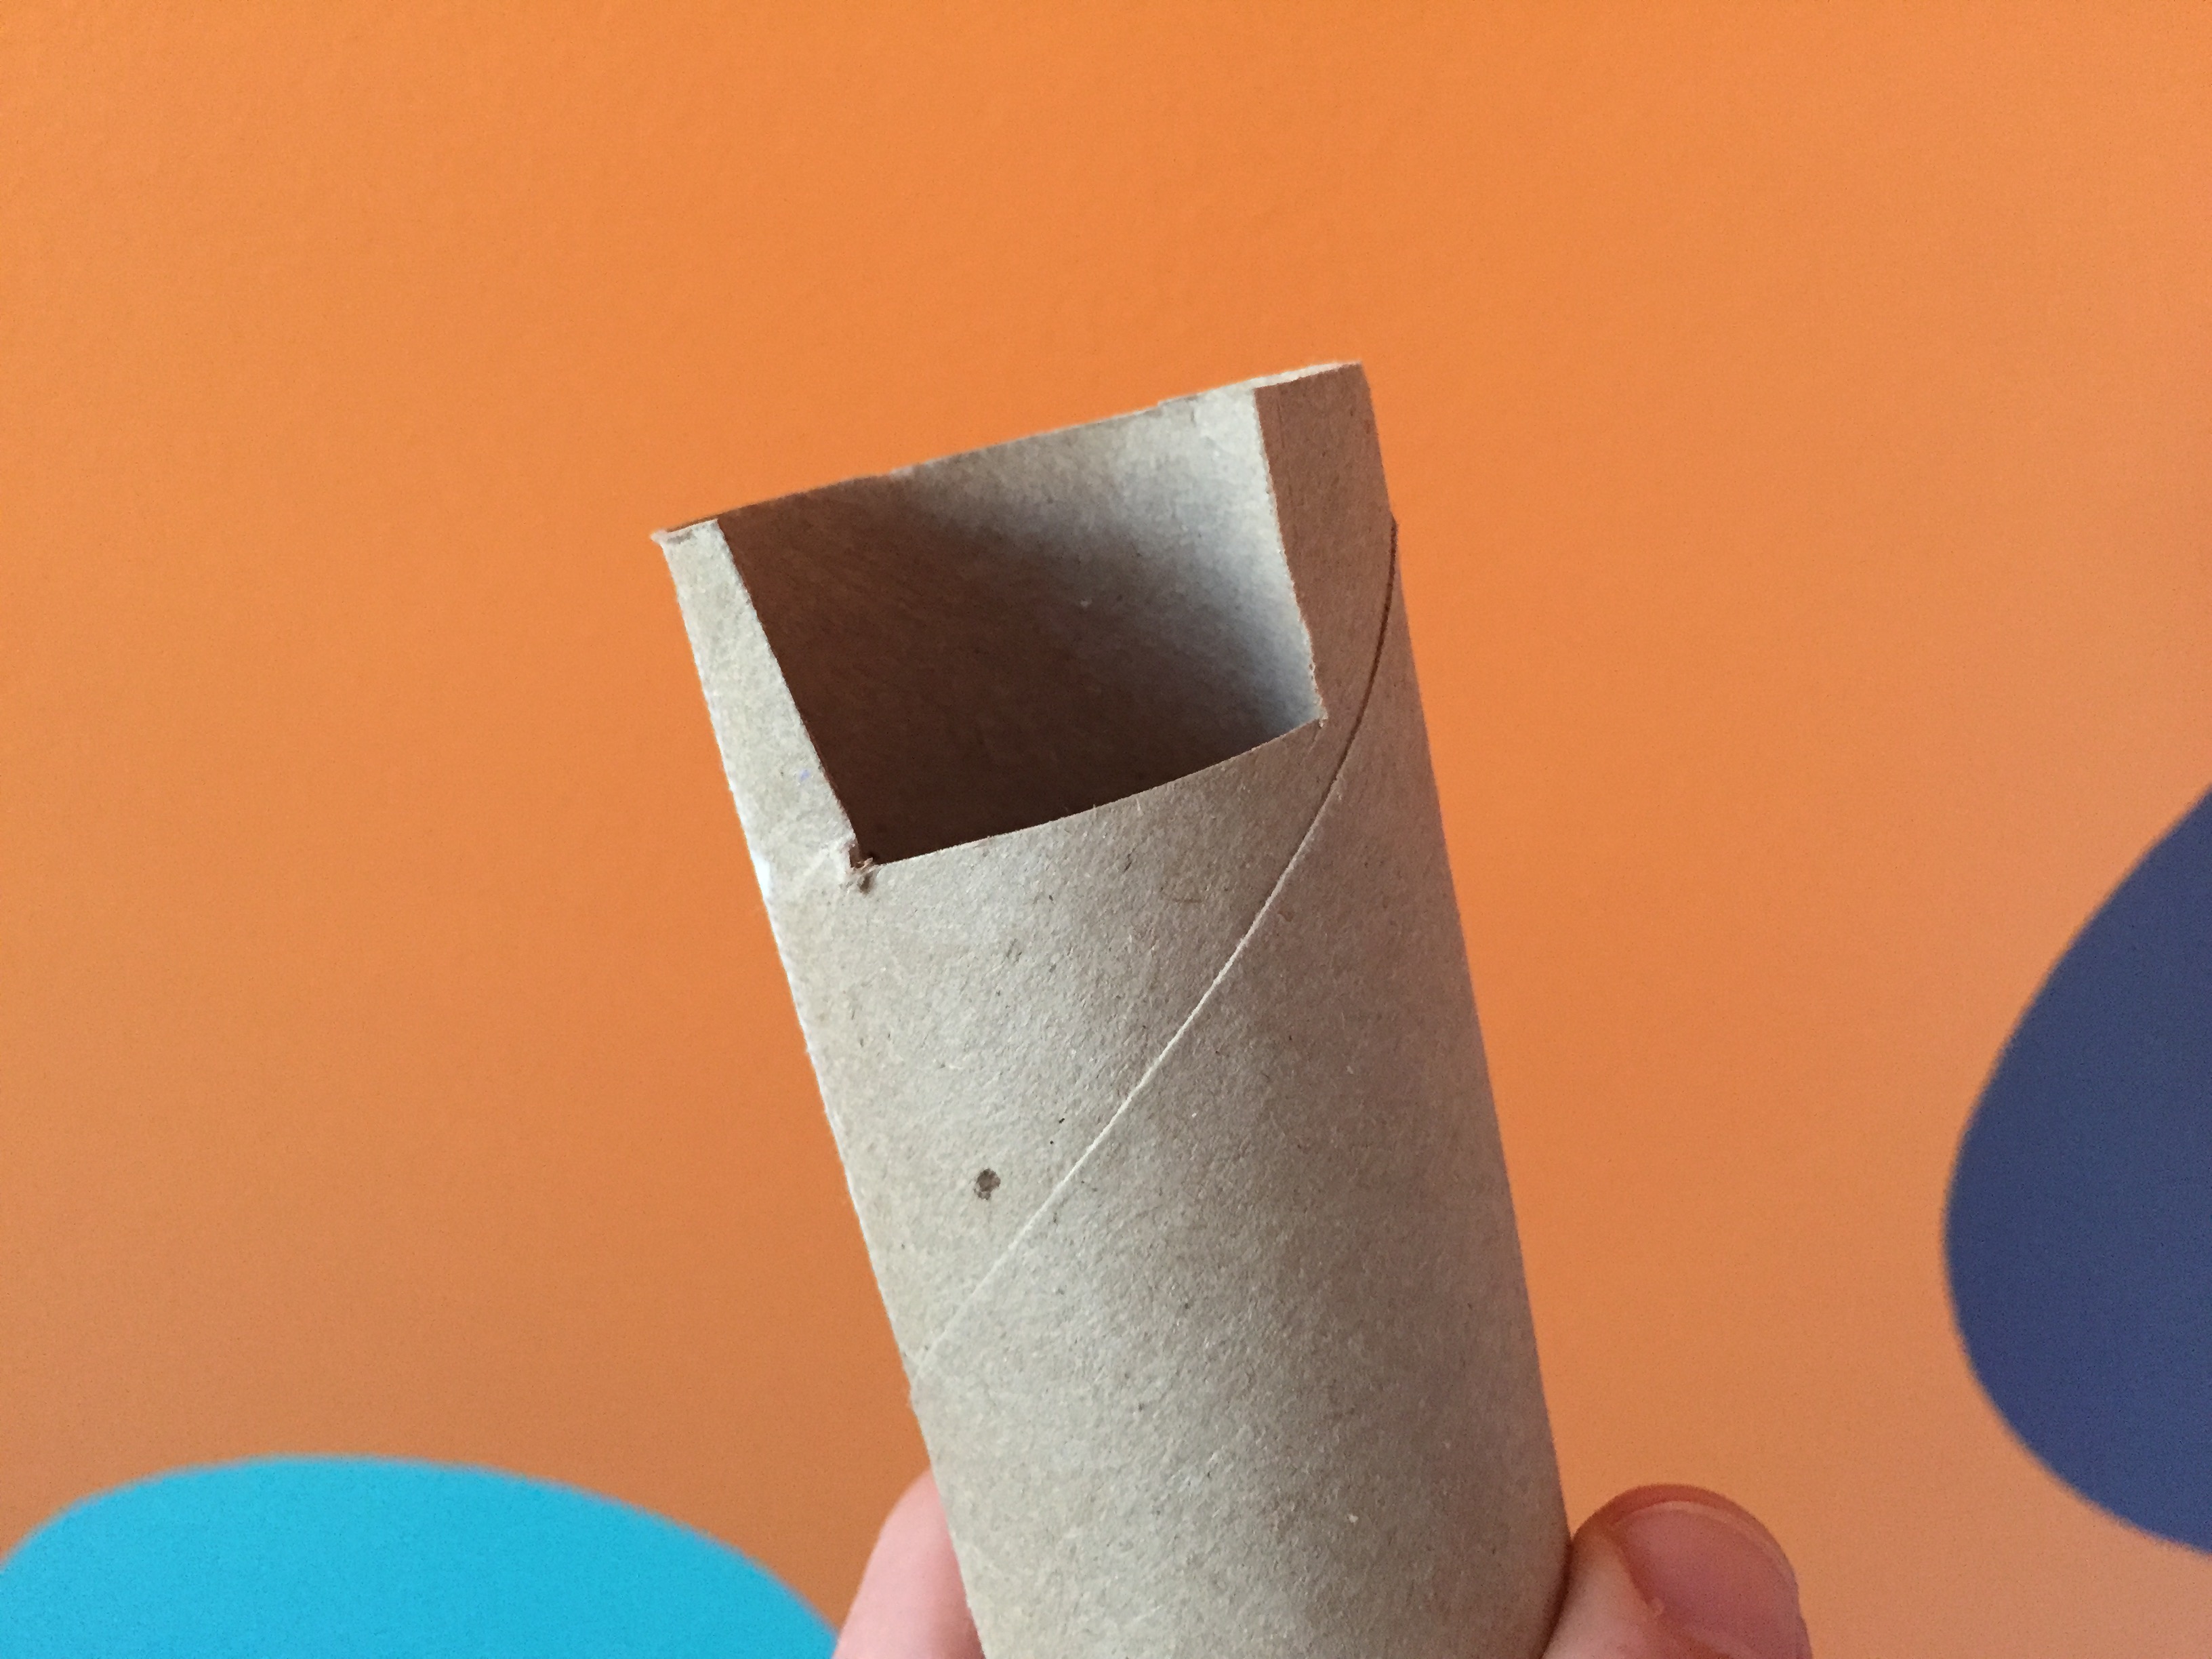
Sometimes being trapped indoors can inspire some great bouts of creative play. Last Saturday was one of those days. The temperature was in the negatives, a storm that locals were already calling the wrath of Elsa was headed our way, and we weren’t about to go anywhere. I was in need of some indoor activities to occupy both the kids and myself, so I turned to the ever-growing stash of cardboard paper towel and toilet paper tubes that I’ve been saving. There never has been a real plan for this pile of trash, but I clung to the idea that eventually I’d think of something fun to do with them. A marble wall run turned out to be the perfect idea for a day of inside play.
With a scant plan in place, we excitedly grabbed our cardboard tubes and painter’s tape and went to town securing tubes to the wall. The next time we try this, we’ll definitely start by sketching out a detailed plan on paper, but sometimes it’s just more fun to jump right in.
If you’re working with a combination of clumsy hands and walls that you’d rather not wreck, I suggest using FrogTape Delicate Surface. Its adhesion is not as great as other tape, but it won’t peel off your wall paint either. If you’re not too concerned with your wall’s well-being, then any painter’s tape should do the job.
In order to keep young minds interested, work backwards and be sure to do LOTS of testing each step of the way. We used a bell that came with a board game so we could hear a satisfying ding at the end of every successful run. If you don’t have a bell, try finding something else that makes a fun sound, like a toy xylophone or drum, or even a tin can.
The rest of the build is pretty straight forward and limited only by your imagination, although you won’t get very far without having to do some problem-solving.
For instance, we had to figure out how exactly to get the marble to drop from one tube into the next, something we initially overlooked. Cutting them in half lengthwise, like a half-pipe, made for a simple drop from chute to chute, but we found the tubes were much harder to tape to the wall that way. Instead, we cut out small notches for the marbles to pass through. We also had to plug the end of a few tubes to stop speeding marbles from launching out the other side.
You can go crazy with incorporating other light objects into the design. We thought about using some kitchen funnels but our marbles wouldn’t fit through the small holes, so we improvised with a plastic milk jug and styrofoam coffee cup. We ended up liking these recycled items way better.
At one point, while my son and I were playing, we noticed that my daughter had ditched us. I figured that she hit her limit and finally got bored with the project. I was wrong! As it turns out, she left to design her own marble run without any help! I love the design she came up with, and how she sometimes has to jiggle one of the tubes when a marble gets stuck. A little more tweaking should solve that problem. This was a super fun project, and I think would appeal to all ages. I sure had fun! If you try it, please send some pictures our way!