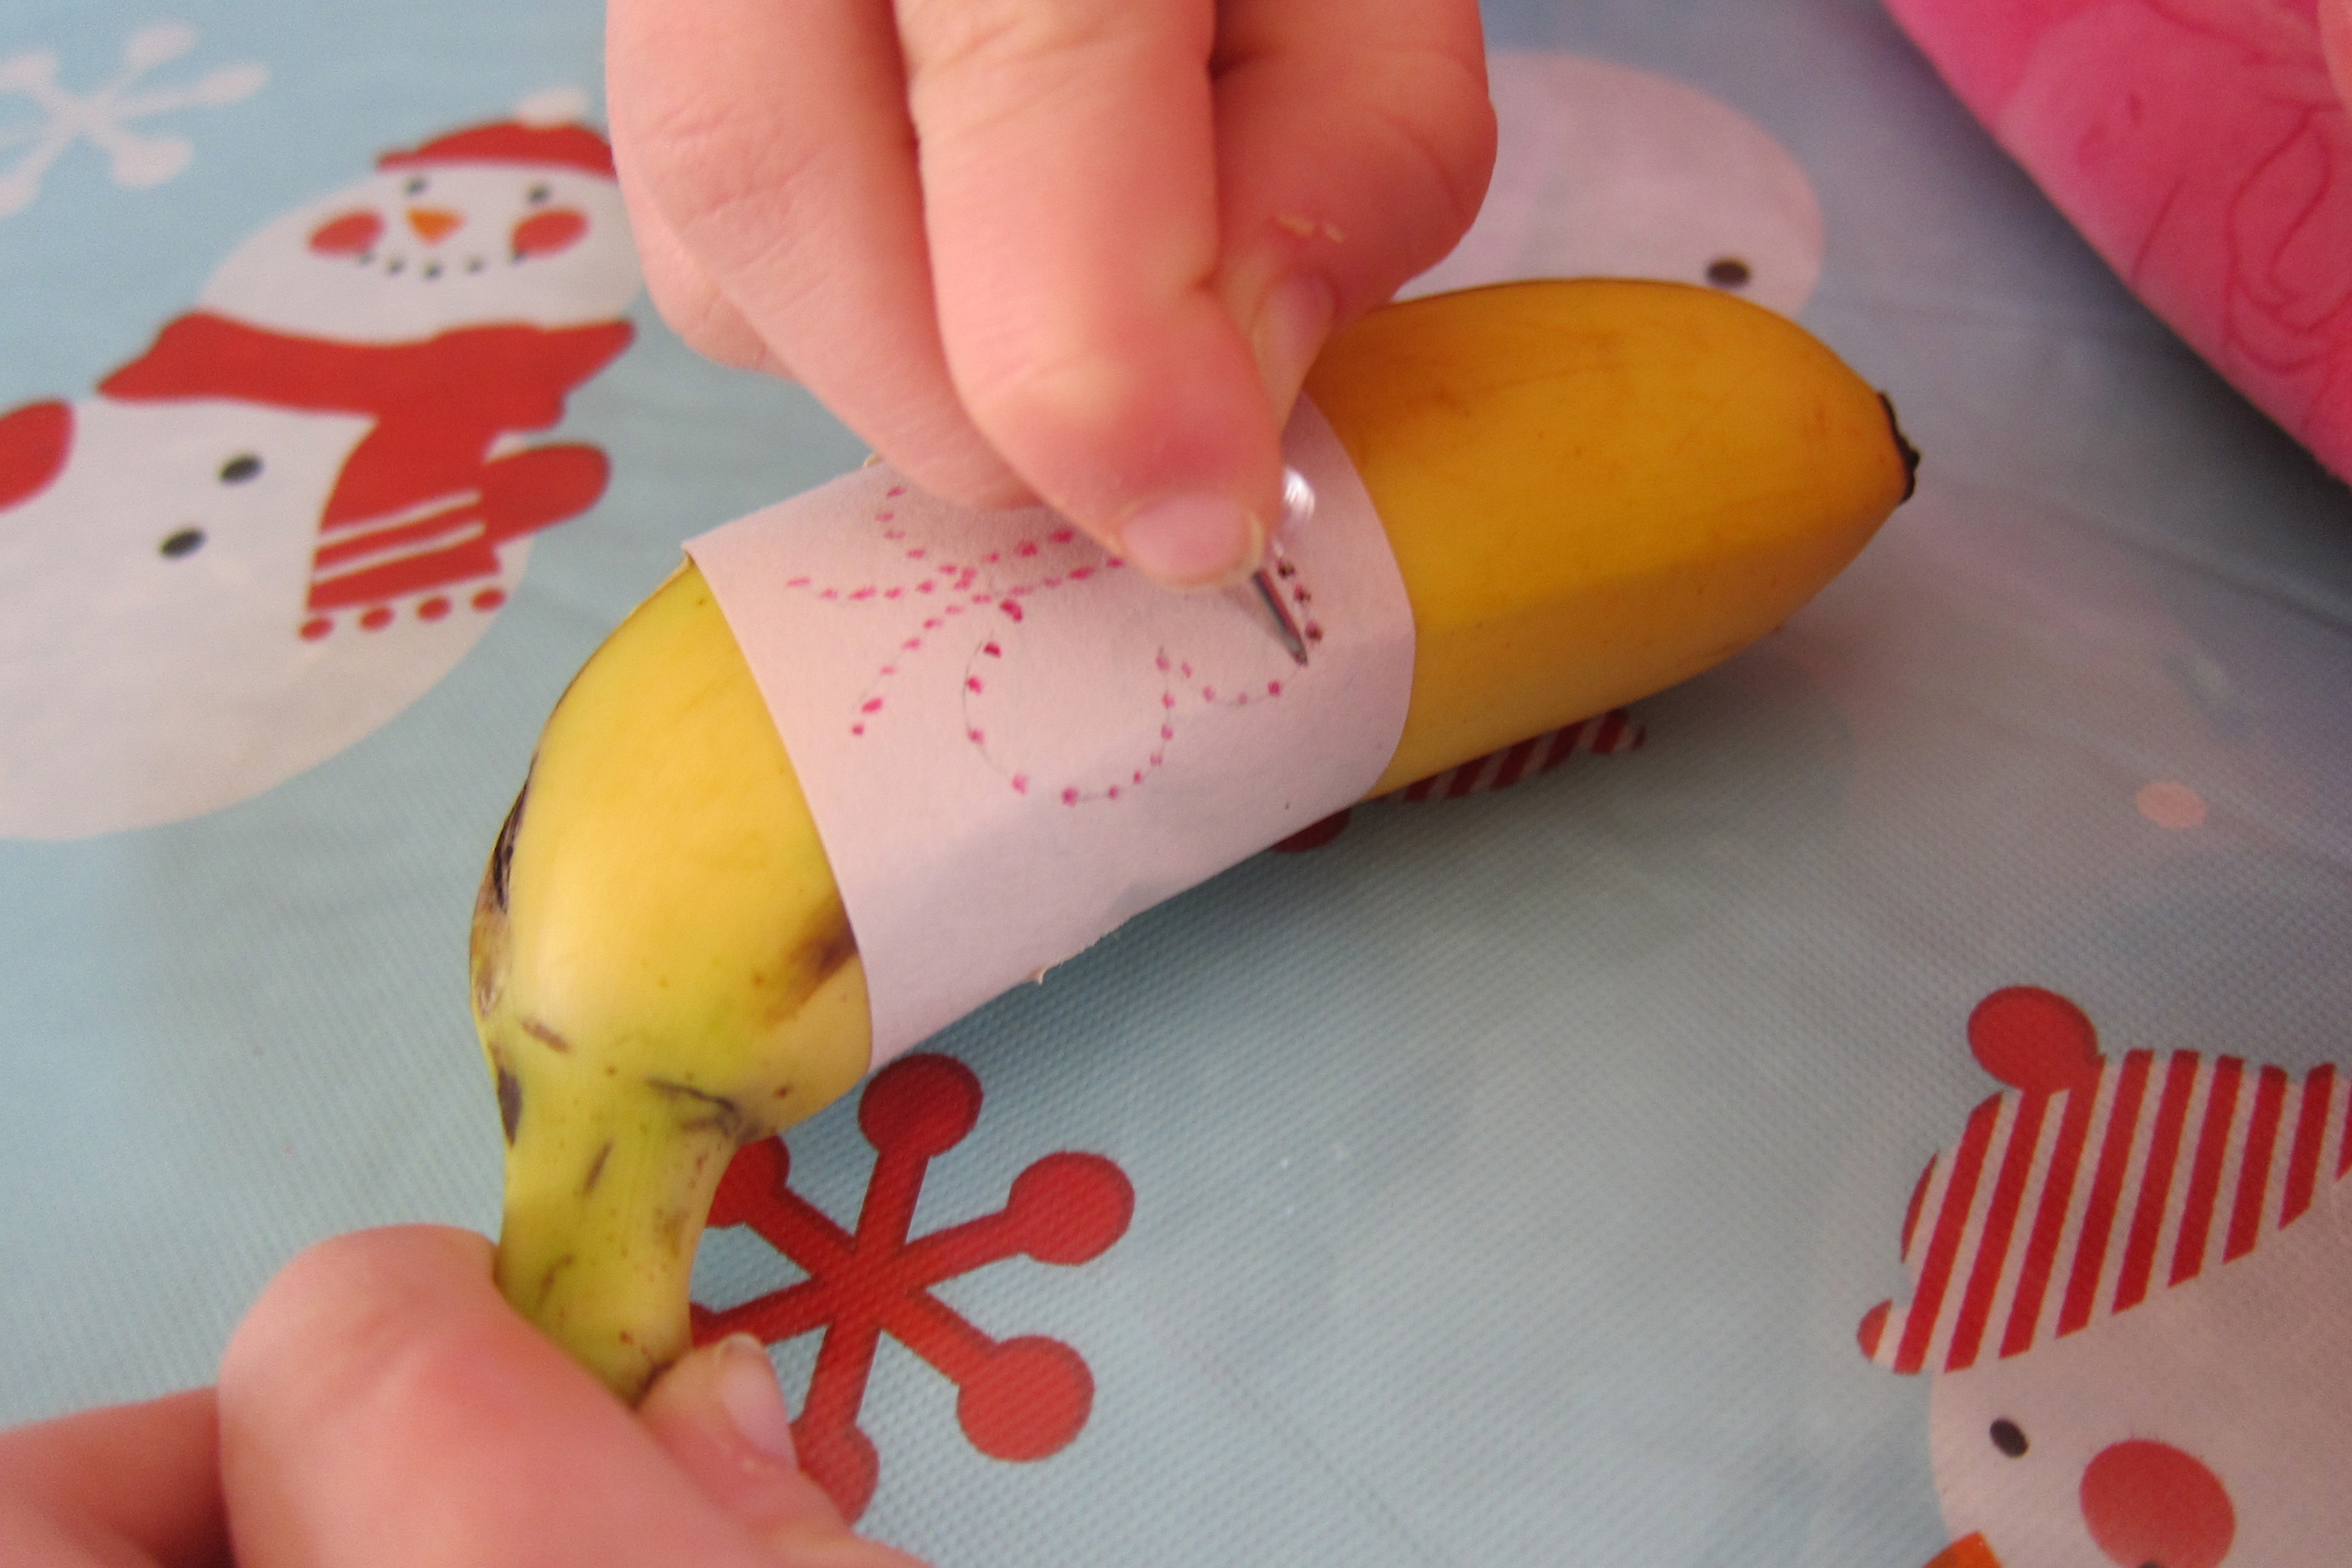
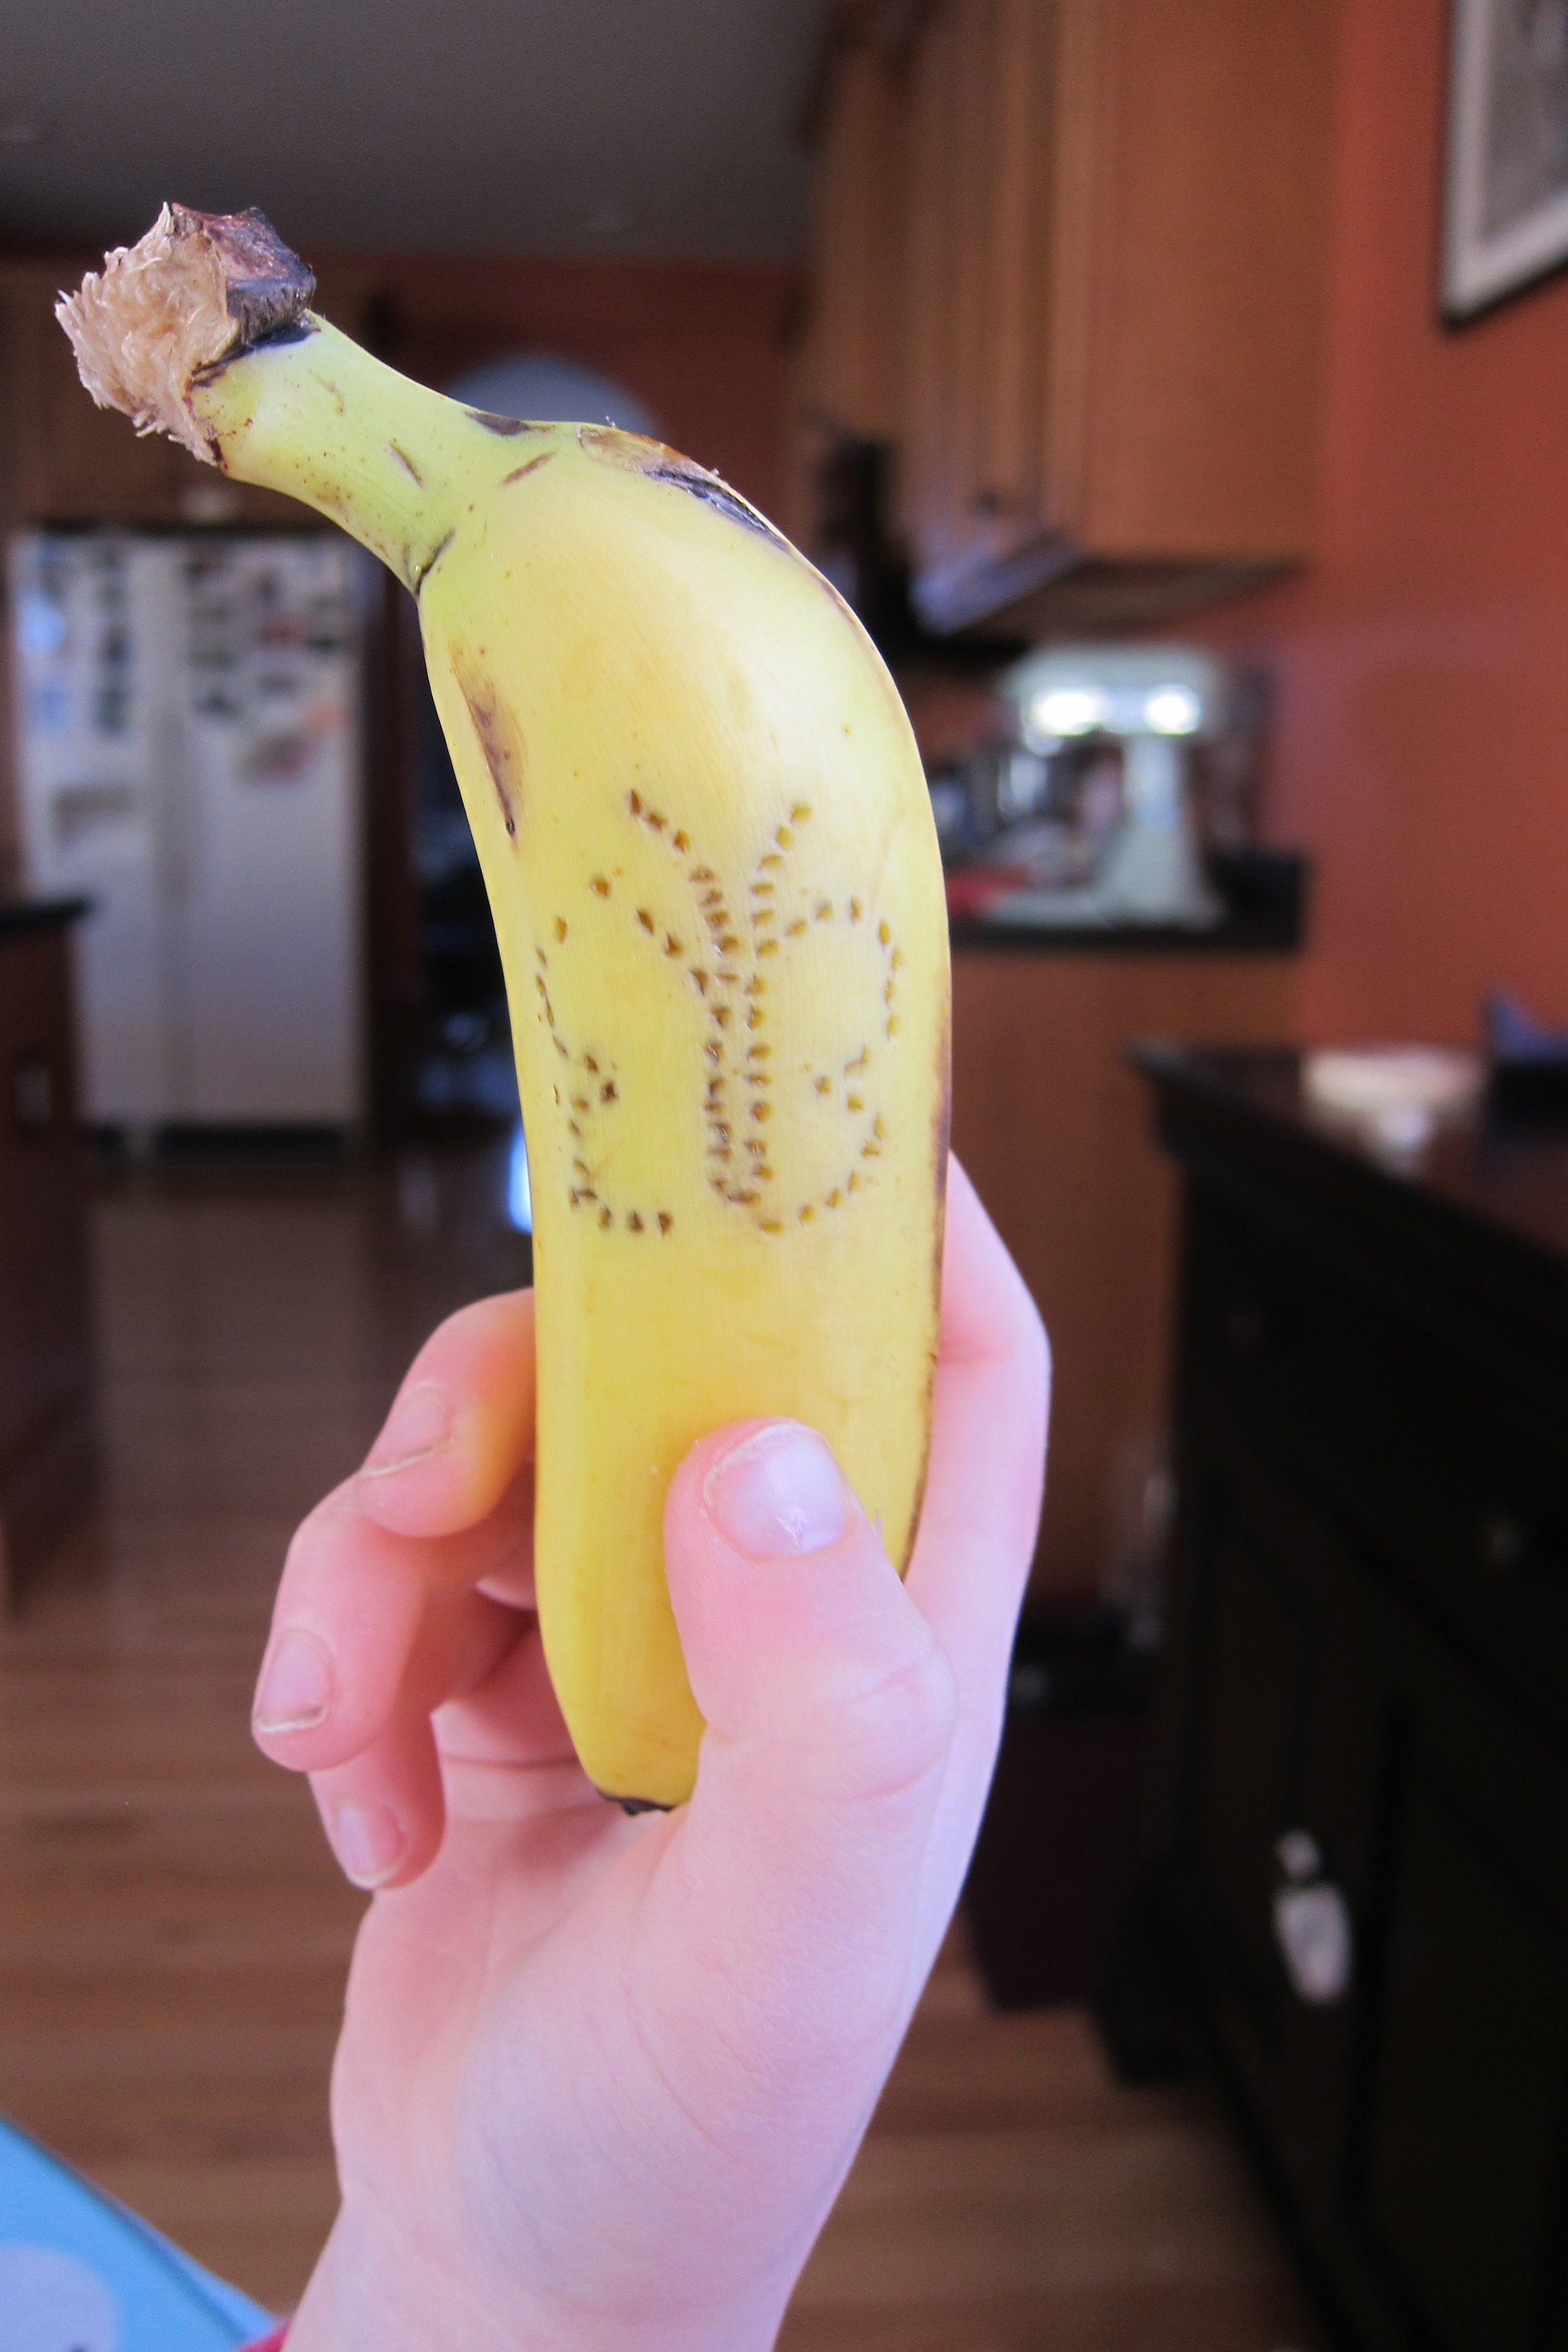
I found this Tattoo a Banana video by multimedia artist Phil Hansen, and I couldn’t wait to try it out. All you really need to do this is a banana, a thumb tack, and some imagination. My daughter did some ABC’s and stars on a large banana and also chose to tattoo a butterfly on a cute little baby banana.
I waited until the kids were in bed to start on my C3PO banana tattoo. That way I could work uninterrupted. I made the mistake of trying to work on the backside of the banana, which meant I had to constantly turn it and also hold it steady for an eternity with my left hand. As I should have guessed, my hand started cramping up after a short while. Then my phone (which I was using as my time-lapse camera) began ringing, so I conveniently took this as I sign to bail on C3PO and start fresh.
For my second attempt, I made sure to lay the banana down flat on its side and I picked something less complicated: Curious George peeling a banana with a tattoo of himself holding a banana, and on that banana….uh, you get the idea.
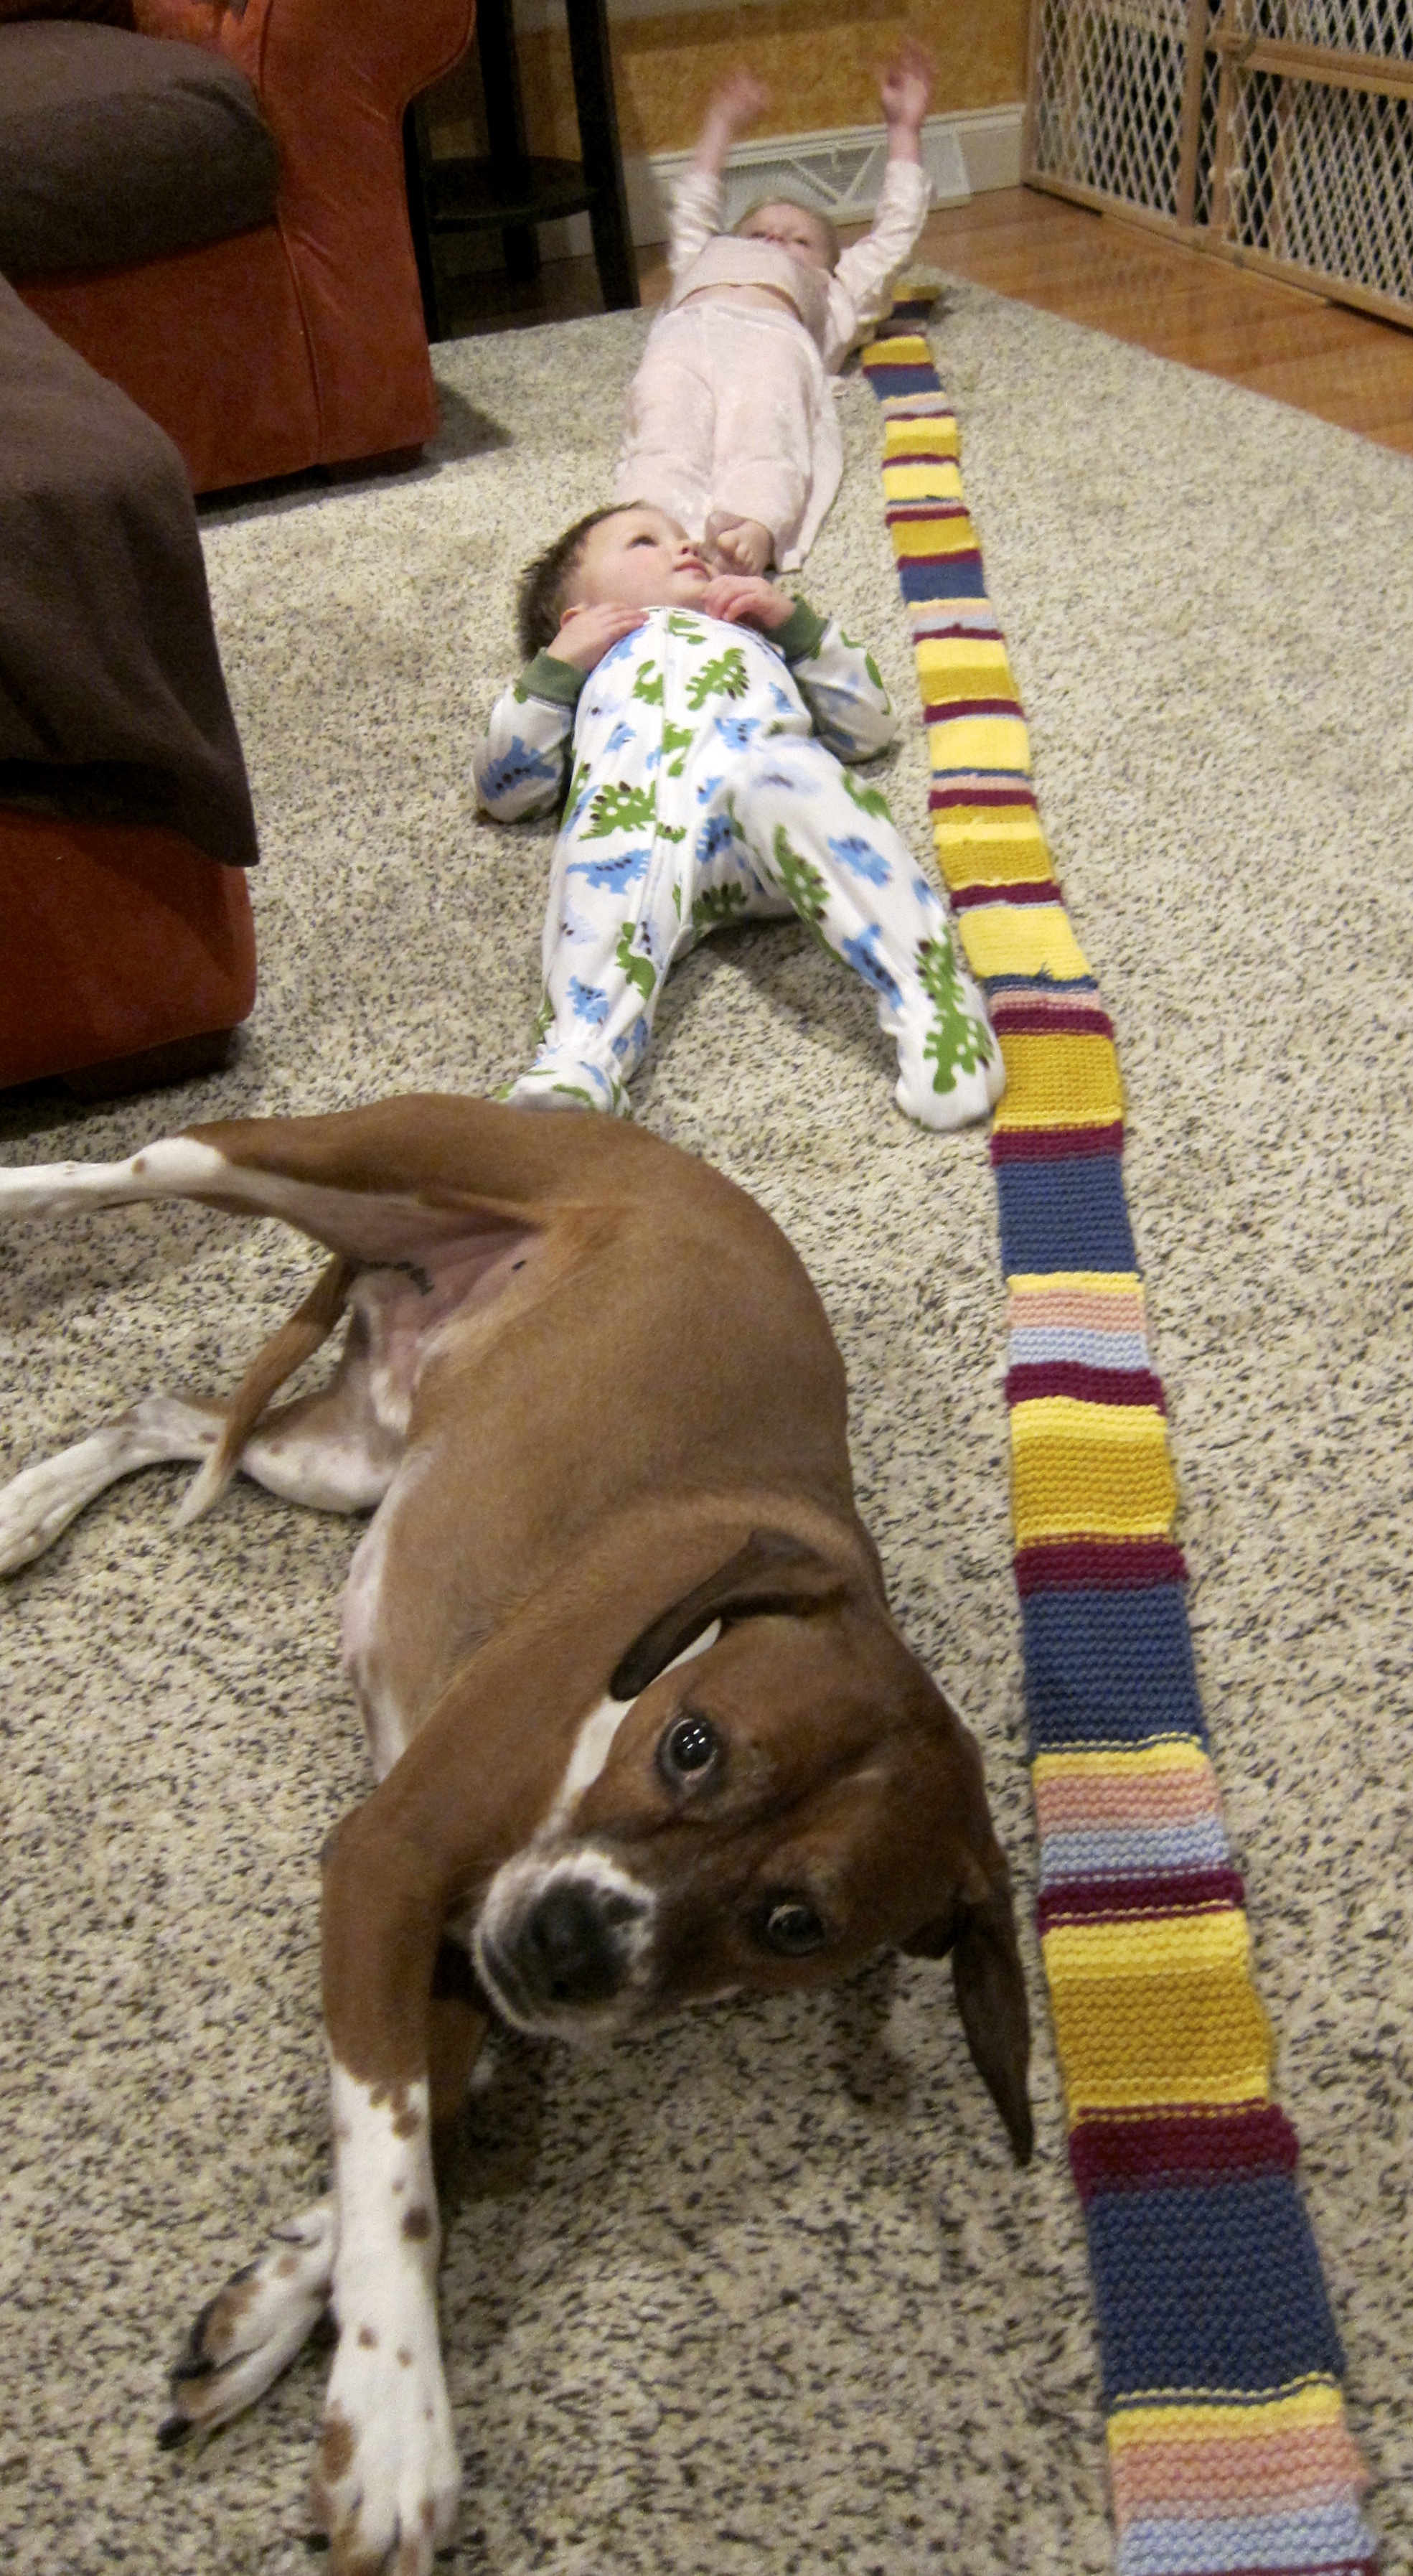
The Doctor Who scarf project from Knits for Nerds is finished! Seven hundred and seventy-four rows of knitting later!
It is roughly ten feet, or, a four-year old girl, plus a two-year old boy, plus a medium-sized beagle/boxer doggy long.
It feels great to have finished this project, and I’m so glad that I tackled it, even though It was pretty a serious project for a first-time knitter. Now I have a new skill in my arsenal, not to mention a very warm neck, or even a makeshift rope in case of an emergency. While I don’t have any other knitting projects on the horizon, I’m certain that I will knit something else at some point in the future. In the meantime, I have the rest of winter to wear my handmade Doctor Who scarf as a badge of pride.
The final issue of Sweet Tooth, by Jeff Lemire, hits the store shelves today. Sweet Tooth became my favorite monthly comic since I started getting back into them again as an adult over the last year or so. Last October I attended my very first convention, the New York Comic Con (NYCC), and there I had the opportunity to meet Mr. Lemire and get his autograph on my mighty wallet! I had previously promised to post a picture, so here it is. Isn’t he cute?
Between Halloween and Thanksgiving, when I had heard that the Sweet Tooth adventure would be wrapping up, I fashioned some fan art from leftover Halloween candy as a small tribute. The kids loved it, of course, because they got to eat him. Here it is again.
Click here to read more on my Sweet Tooth candy art. The next project on the horizon for Lemire is a sci-fi love story called Trillium, which looks andsounds awesome. I’m excited to be on board from issue number one for a change, since I’ve been late to the game for a bunch of other great comics. In the meantime, I plan to catch up on Lemire’s collected Essex County comics, which I received as a Christmas present this year.
I keep a supply of nuts and a container of Sunsweet Ones (individually wrapped prunes) on my desk for grazing throughout the day. I know how this sounds, and to give you a balanced picture, let it also be known that I have been on a quest for the perfect hot dog and hamburger for quite a few years now. I like to balance working out with pigging out.
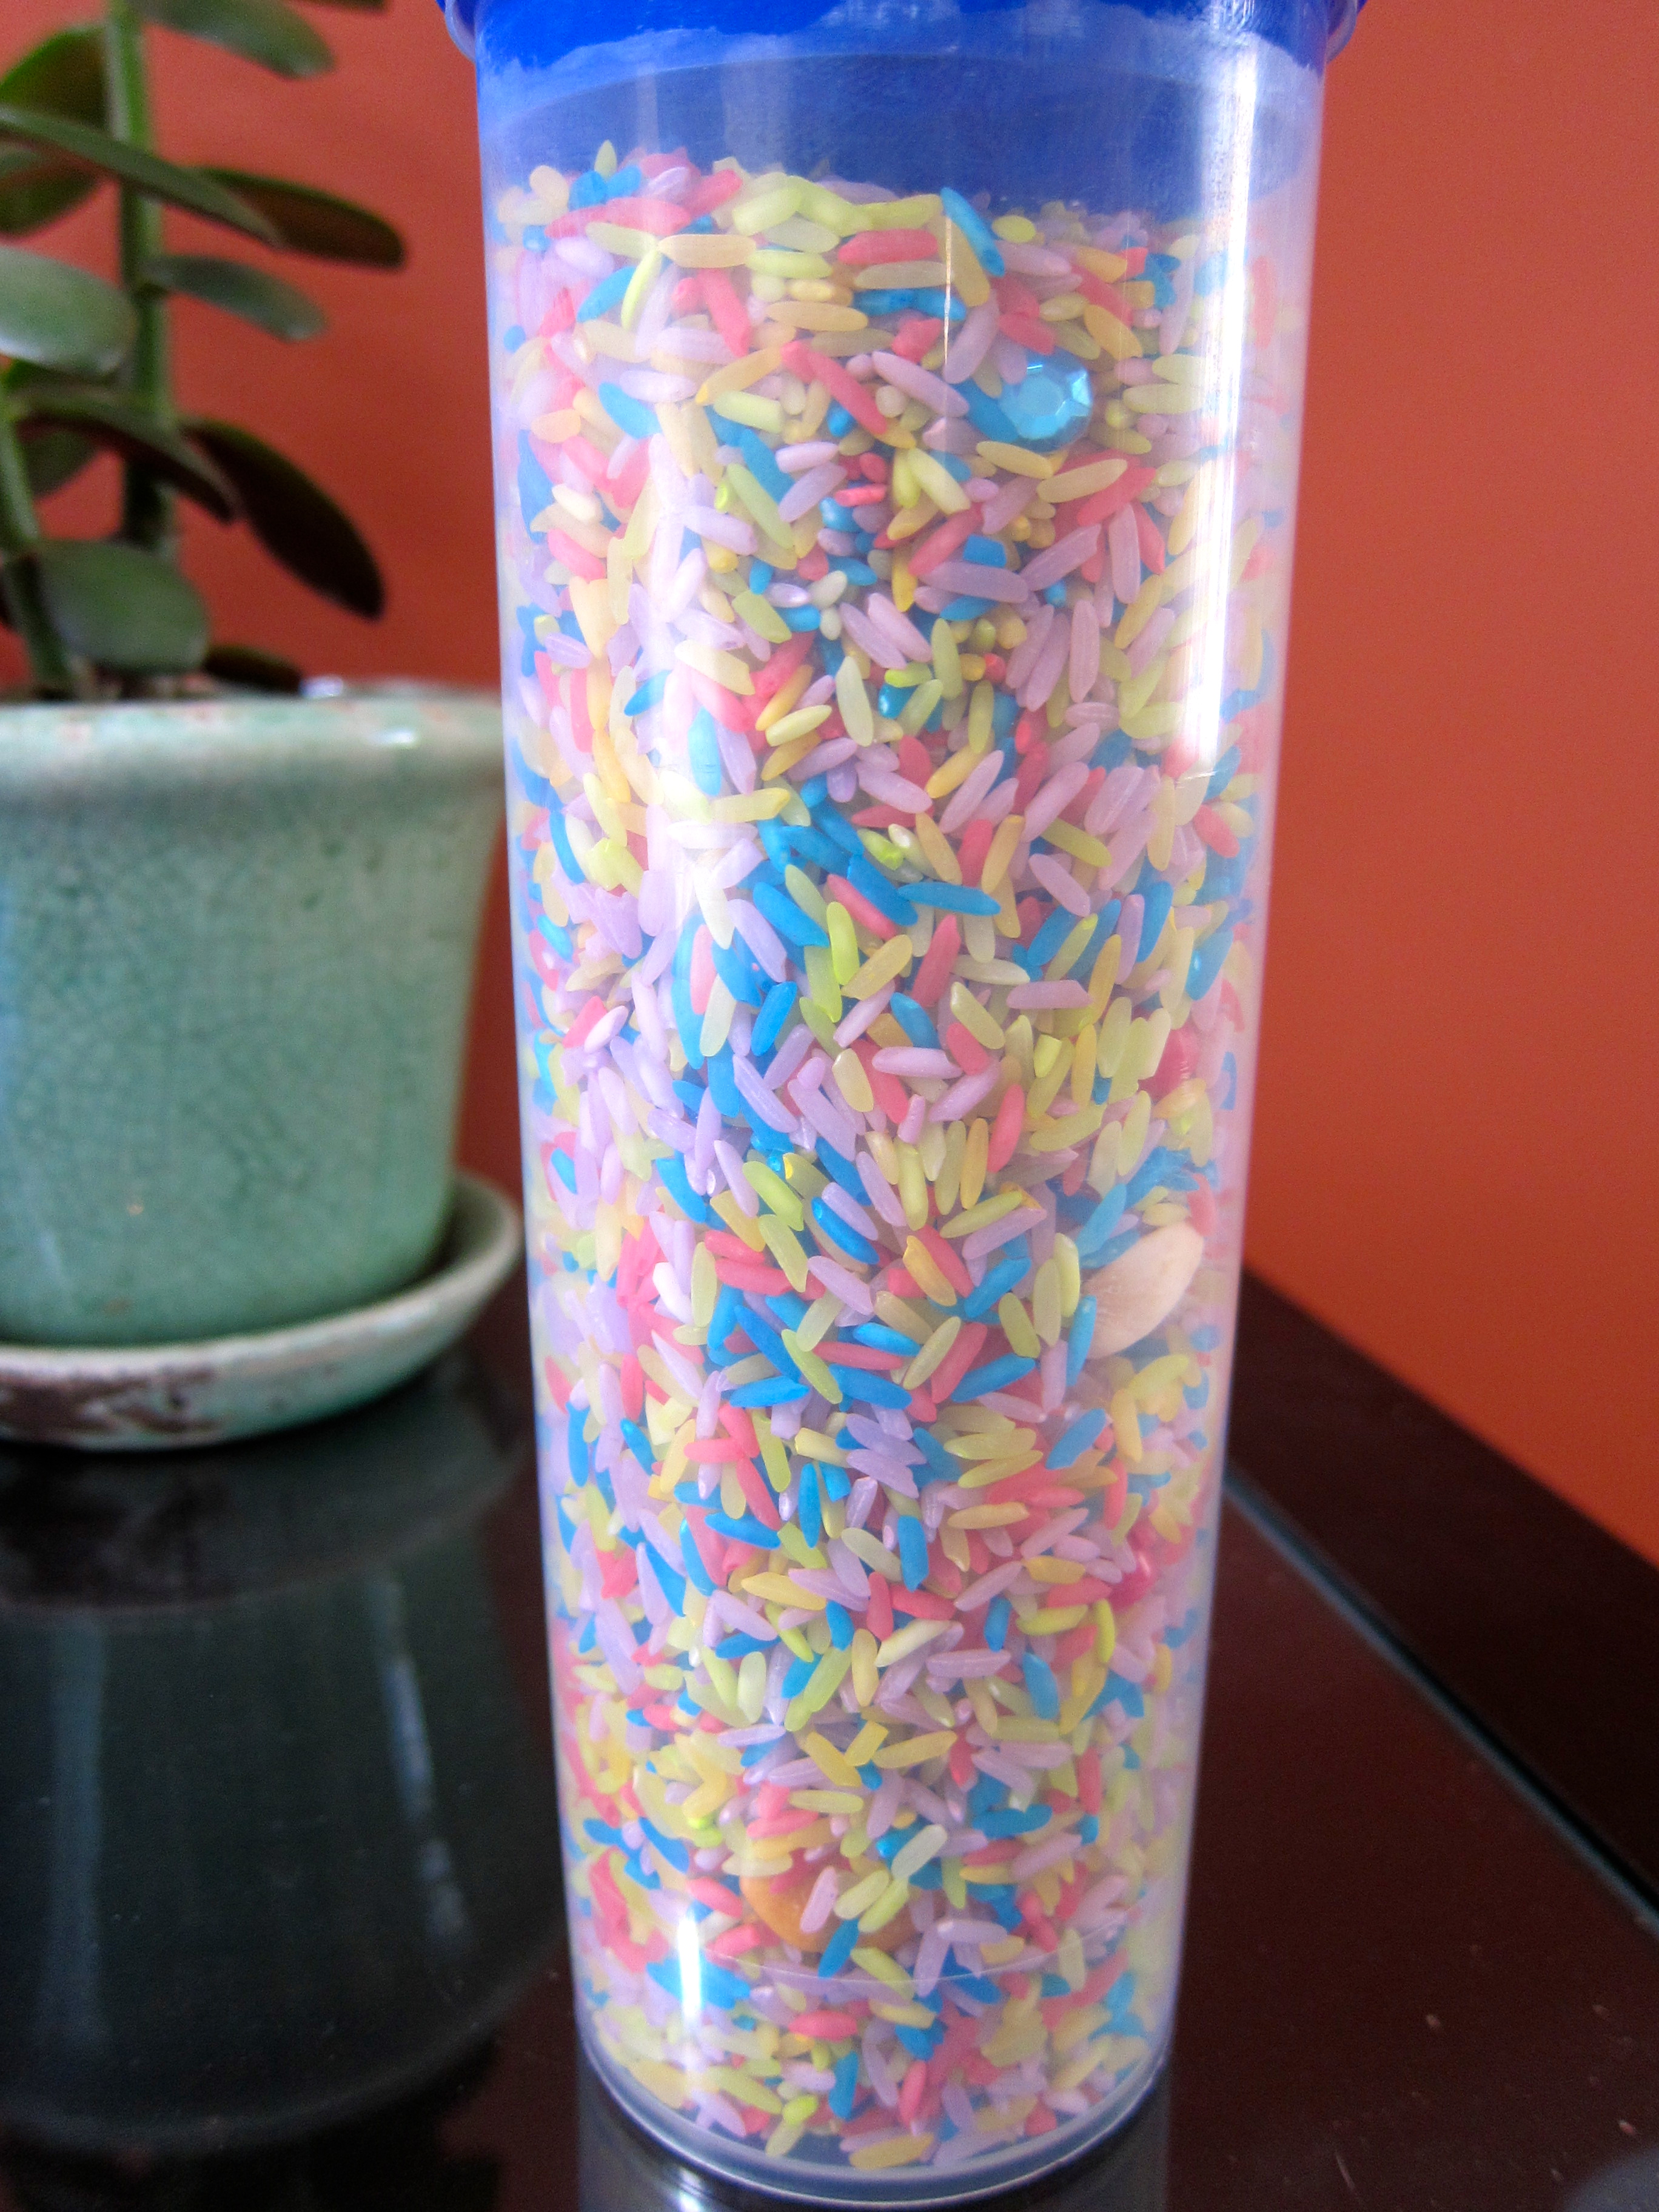
Anyway, I recently finished off the last prune and found myself staring at the empty canister, wondering what I could use it for. It had definite potential to be repurposed for something else… Robot part? Shaker? Drumstick holder? All viable uses. What about a look and find tube? Bingo! It would make a perfect look and find tube! Really, you can use any plastic container that you wish, such as a soda bottle.
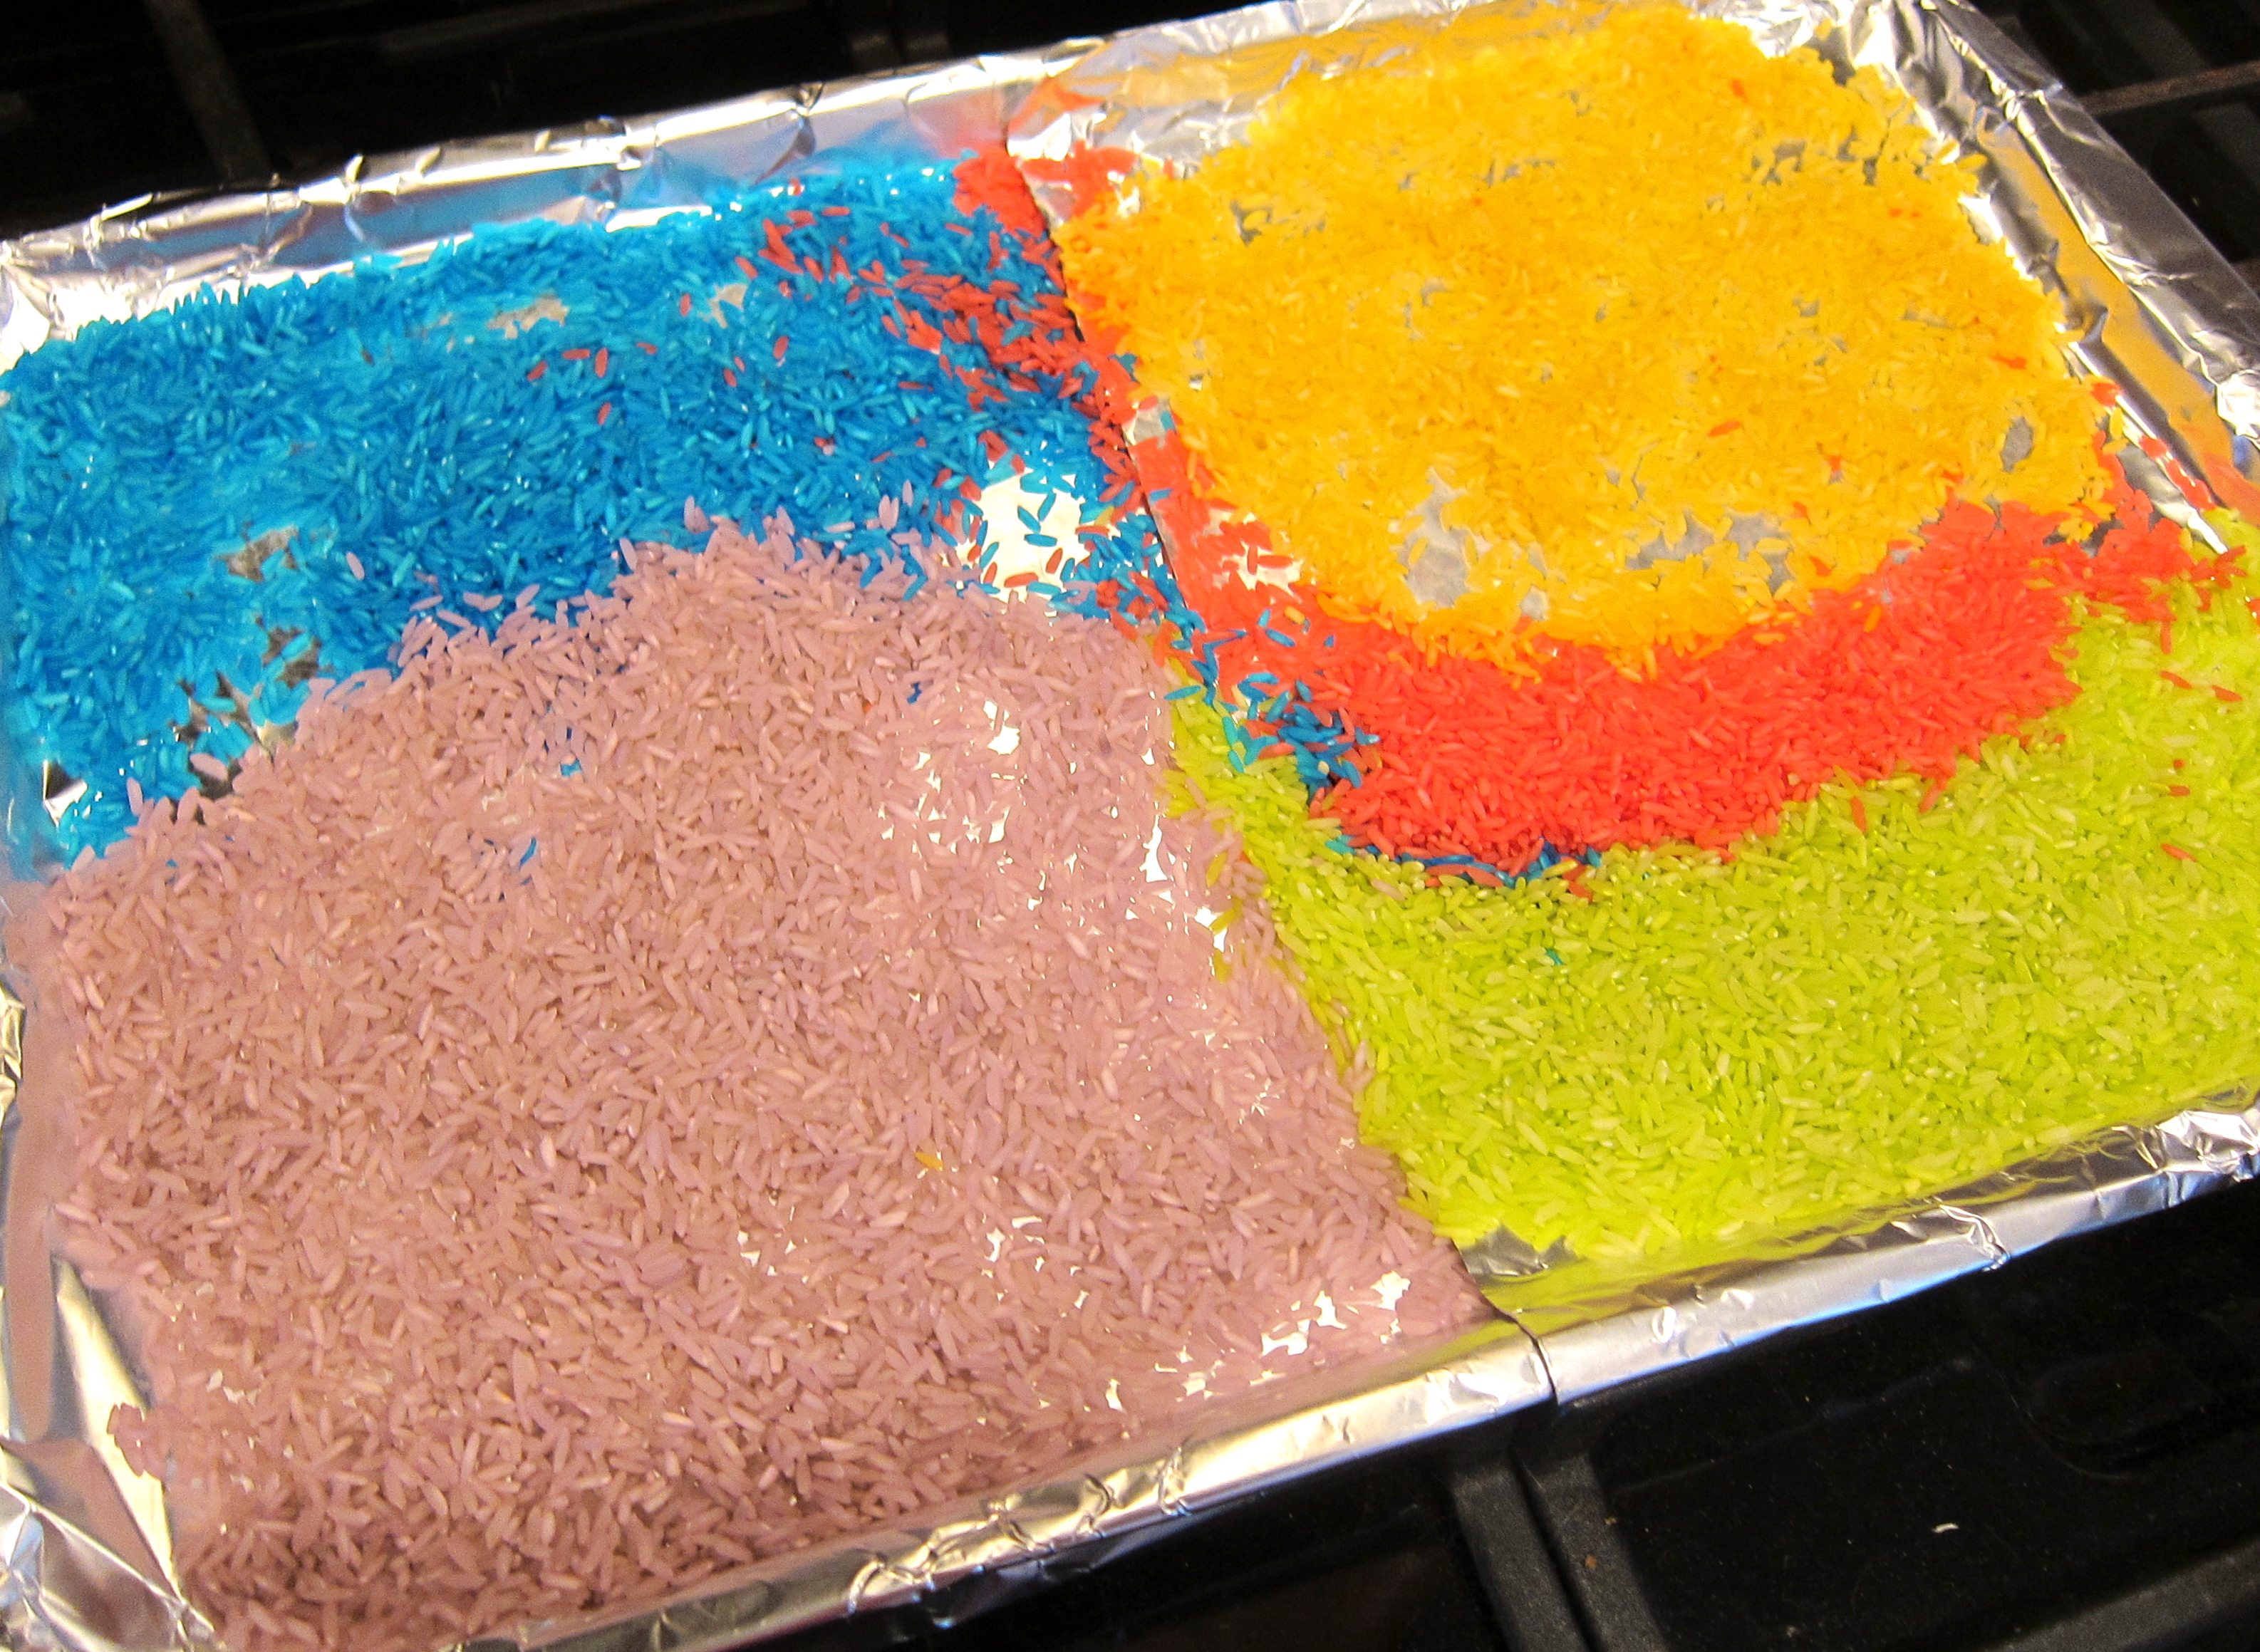
I consulted with my wife about dying rice for the filler, sine she had recently died pasta for another project. I used her technique and it worked out great.
The tube held two cups of rice with a little room to spare, so I divided that into five ziploc bags, adding about a teaspoon of rubbing alcohol and about four drops of food coloring to each bag. Then I let my daughter shake them to her heart’s content. We spread out the rice on a foil lined pan and left it out to dry while we played outside in the snow.
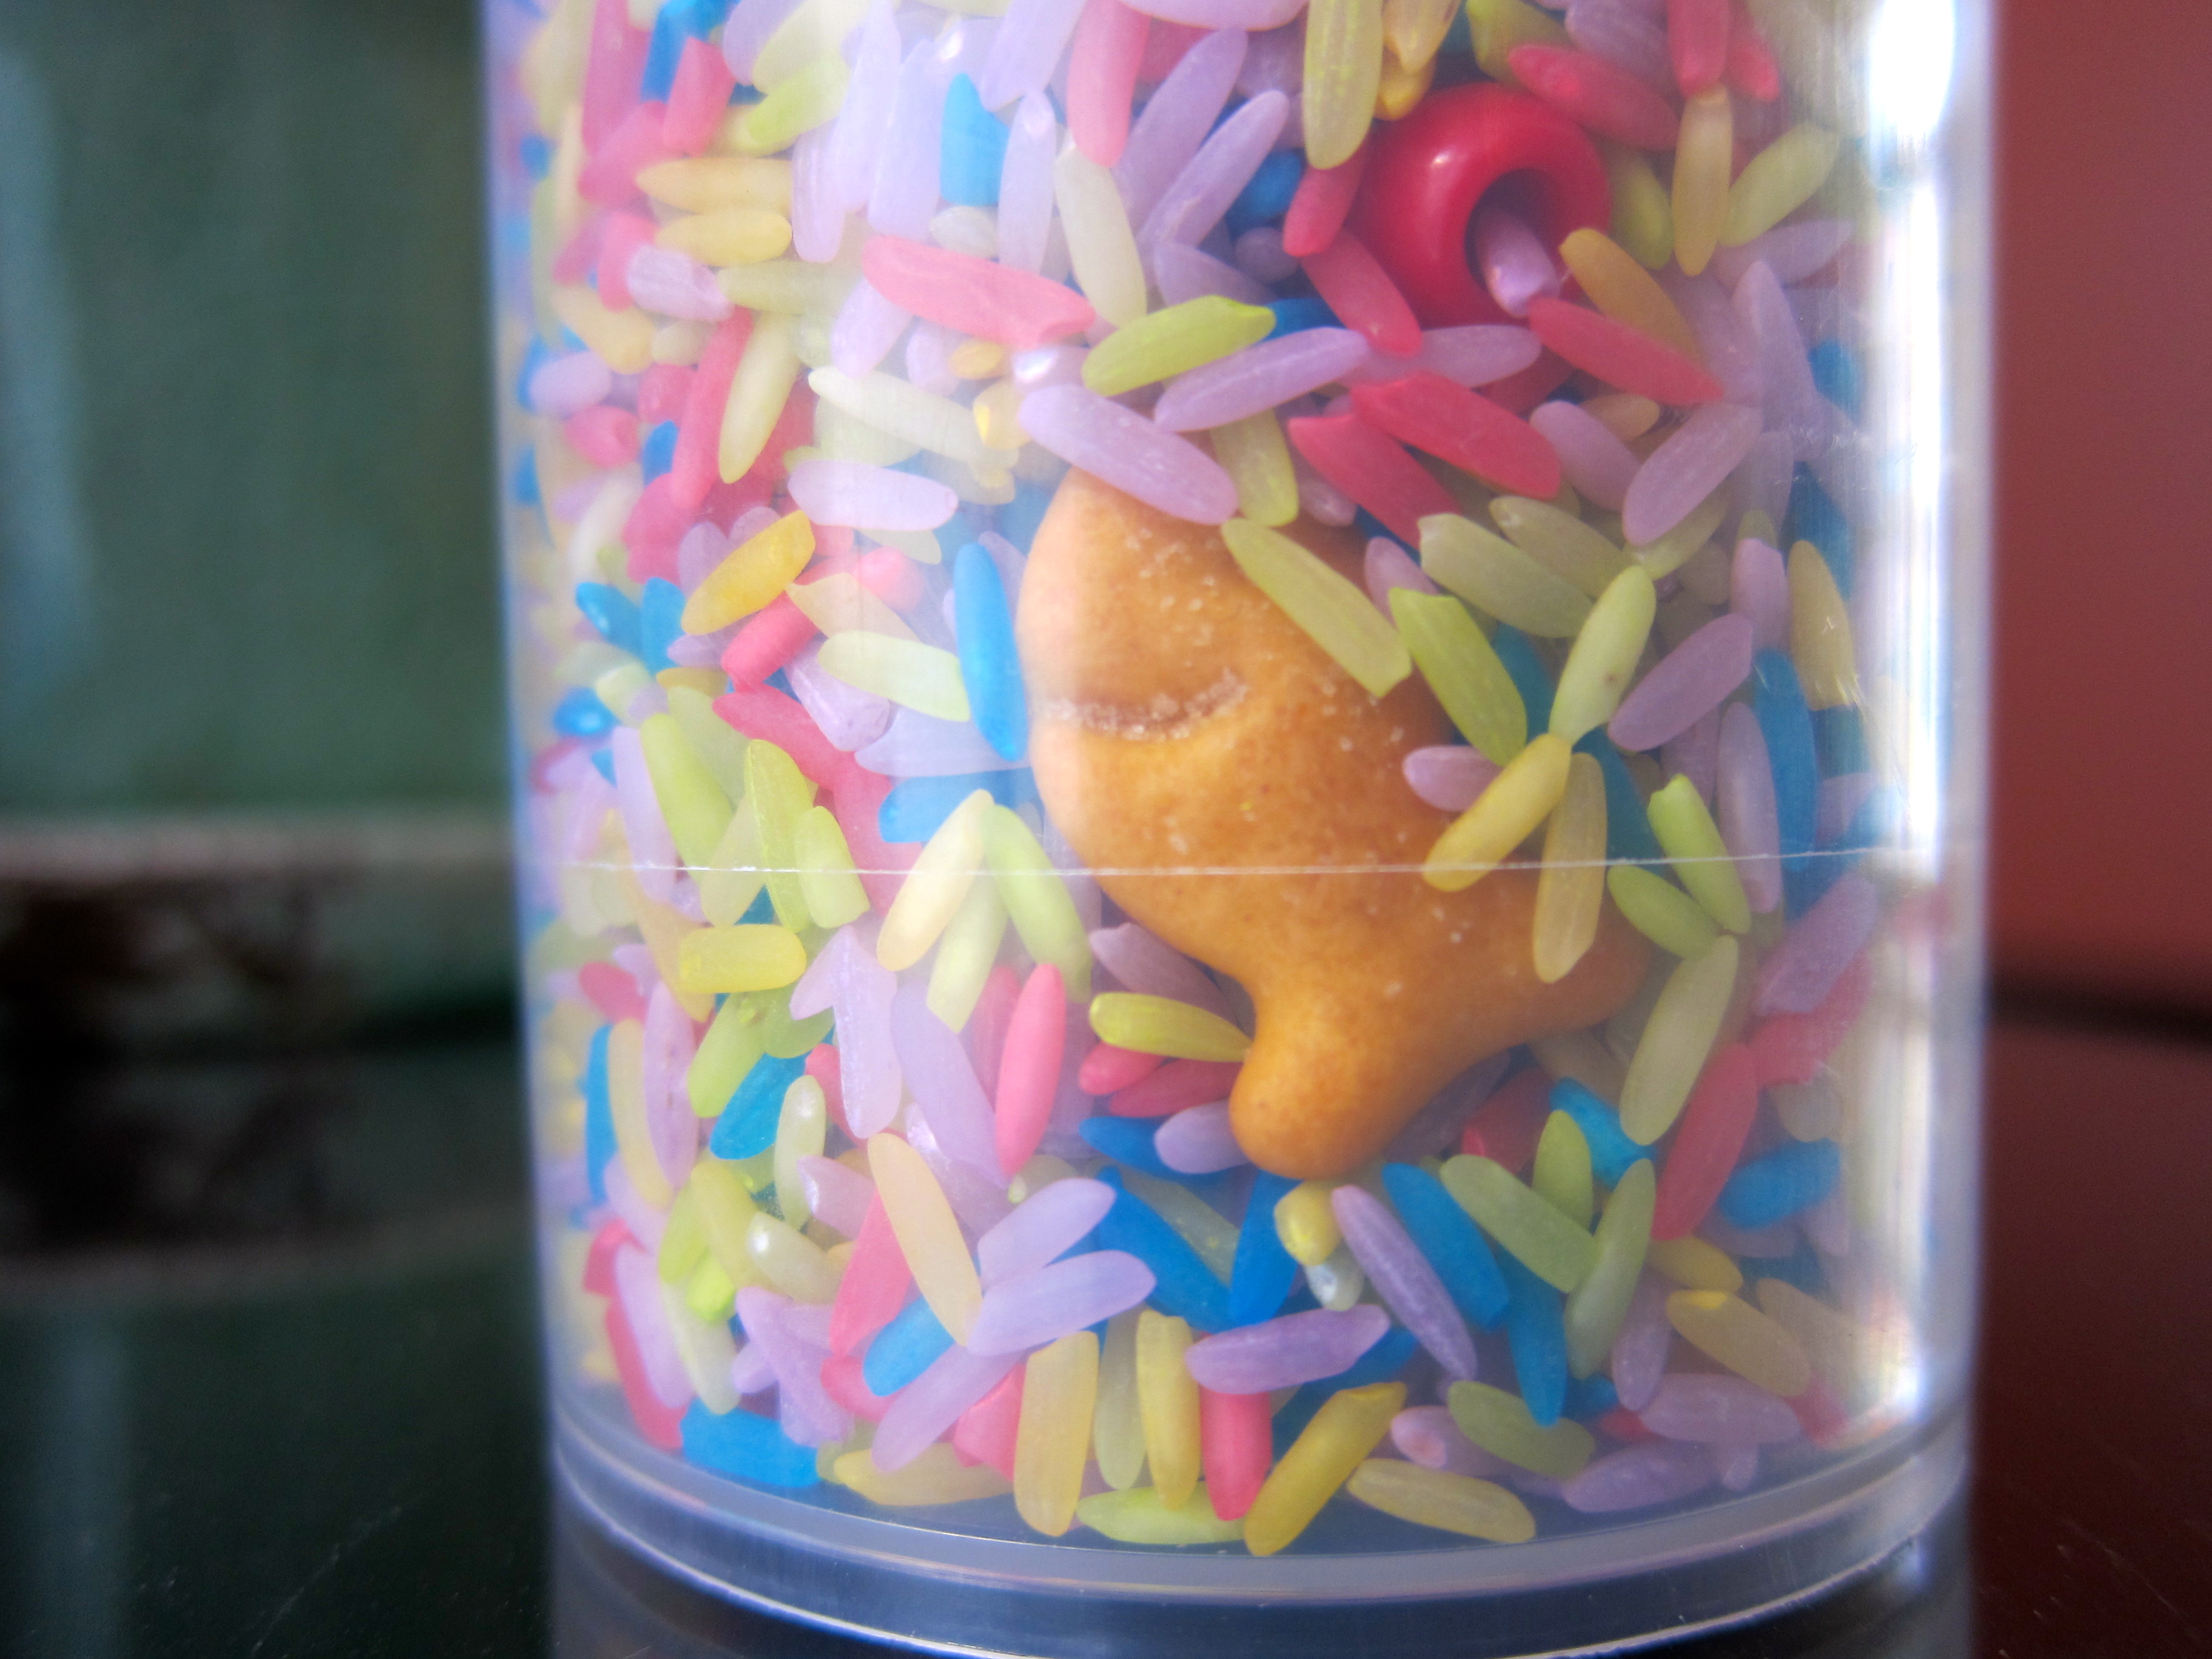
Later that day, I looked around for tiny items to hide in te tube. I thought about putting little miniature people and animals in it, but I didn’t want to have run out and purchase anything since I had already made everything else from what was readily available. My list of found treasures is below. I mixed them with the rice and dumped it all into the tube, using super-glued to seal it. I’d also recommend some packing tape on the lid. This is one toy we do not want to break in the car!
Saxophone lapel pin
Pink Pez
Blue M&M
Brown M&M
Mini green M&M
Flintstone vitamin
Chalk
Pistachio
Cocoa dusted almond
Broken red crayon
Goldfish cracker
Red bead
Pair of googly eyes
Pencil eraser
Black pen cap
Red paperclip
Washer
Drywall screw
Penny
Nickel
Dime
Match stick
Yellow paperclip
Hair clip
Large nut
Small nut
Dog treat
Pushpin
Pen spring
Tiny yellow hair band
Blue gem
Toothpick
When my kids get board of finding item from this lists I’ll cut open the container, throw in some different tiny treasures, and seal it back up in a new container. You can also take a picture of all the items so your kids can know exactly what they are searching for (I wish I would have thought of the BEFORE I sealed the lid).
I ‘ve been casually on the lookout for stop motion software to play around with for some time now. I was in no hurry, however, when I came across iStopMotion in the Apple App Store on sale for $19.99 I immediately snatched it up. The sale ends tomorrow, and the normal price is $49.99! If you or anyone you know is in the market for stop motion or time-lapse software for Mac, check it out now while you can get it at a discount! Apparently there is a free companion app that allows you to use your iPhone as a remote camera over your wi-fi network.
As the kids grow up, this should be a great source of family project fun. Of course, I’ll have to thoroughly test it out first. Fortunately, I’ve had some interesting ideas for stop motion movies in mind for the longest time. Now I can finally dig in. This would solve my problem of not having a HD webcam. I’m pretty excited to try all of this out. Check back soon to see how my home-brewed stop motion movies turn out!
I’ve climbed to the highest peak of Mount Knitting, and now I’m taking a brief respite to enjoy the view that overlooks Yarn Gully. That’s right – I’m halfway there, precisely 50% done! I can report this fact with complete certainty because I made a chart to track my knitting progress. Yeah, I’m that guy.
The scarf is now way longer than both of my kids, and it’s getting pretty close to passing me out as well.
Highlights:
I know I’m knitting much faster than when I started. Go me!
The official measurement at the halfway mark is 5 feet, 3 inches. According to the book, the finished product should be 10.5 feet. I can’t quite believe it, but I’m amazingly right on track. I originally misread book and thought the end result was supposed to be 20 feet long. Phew!
This scarf is producing lots of scrap pieces as I cut off the tails, so I started saving them and made a cat toy.
The biggest and most exciting news is that Toni Carr, author of Knits for Nerds, found my posts last week and wrote some very kind words of encouragement! What an awesome surprise! This will surely keep me motivated through the second half of the project.
Overall, this project is turning out to be a blast! Much more so than I could have imagined. Knit on!
The Twinkie Trilogy paintings have been sold to…..(drum roll, please) my mother-in-law, who will be hanging them in her home! Honest. I made her promise to send a picture for proof. I woke up the morning after posting it to find the confirmation of sale in my inbox. She claims to love them and did not buy them just to support me, and I’m choosing to believe her (love you, and Happy Birthday!). How cool is that?
I’m still sort of interested to see, however, if there are any Twinkie fans out in the general public other than my loving, supportive, and quirky family, who would actually purchase and hang Twinkie paintings in their home. Therefore, I am relisting them on Etsy as made-to-order items. The cool thing about listing it this way is that I can customize the work for the customer.
I’m glad that the Twinkie Trilogy has a home and that this project is one that actually achieves closure. Otherwise, who knows how long they would sit on the shelves at Etsy. Now it’s time to focus on my knitting project again.
Last night was art night at the Secret Dad household. While the kids tried their hands at finger painting, I rummaged through the old paint box and pulled out some acrylic paints and some blank canvas boards. I wound up turning an ordinary finger painting session with the kids into a nightlong affair. My inspiration actually goes back a few weeks, when I had first learned that Hostess Brands was going bankrupt. I checked at every local gas station and grocery store to see if any Twinkies remained. Alas, it turned out that I was too late, because no matter where I looked, there were no more Twinkies to be had. I actually hadn’t eaten any Twinkies myself in years, but I felt that I owed it to my children, so they could someday recount to children of their own how they tasted the most famous and coveted pastry item in history. All of this is, for some reason, the first thing that came to mind as I stared at my blank canvases. By the time my work was done, the kids had been asleep for a few hours, and would awake bright-eyed and bushy-tailed the next morning to examine the finished pieces. When my wife asked what I would be doing with them (basically implying that they would NOT be hanging in our home), I explained that I was going to entrust them with a deserving friend. I just had yet to figure out who the lucky friend would be. My daughter suggested that I sell them at a yard sale, but because December yard sales in the northeast are about as popular as calls from telemarketers, I instead opted to open an Etsy store and try my luck there. The ultimate Twinkie mega-fan is bound to be out there somewhere, tirelessly searching for an acrylic Twinkie trilogy, and I know that somehow, some way, fate will bring us together. Our proceeds will go towards purchasing more craft supplies, of course. Although, if we were really business savvy, we could assuredly fetch much more for my son’s abstract art… Or perhaps even my daughter’s horse and froggy, lost, in an enchanted forest of cloud-hands…
I just started dabbling in Kite Aerial Photography (KAP), and I’ve found that once you experience getting your first rig up in the air and start seeing the actual results, you’ll immediately move on to pondering how to improve your design and execution. In other words, it can quickly turn into a very geeky hobby. Above is a short clip of my first flight. I was actually able to get the rig much higher than what is shown, but I didn’t bother including any clips because the video became VERY unstable at such heights.
With the help of this online KAP resource, I built a Picavet to suspend the camera form the line. This is a must in terms of stabilization and to keep your camera pointed in one direction. It was quite windy during my flight, and I had a few problems with the rig getting tangled during launch as well as descent. I now realize that I made the Picavet sling WAY too long, which contributed to the problem.
I’m currently using a lightweight keychain video camera that I purchased on eBay for about fifteen dollars. It’s not the best picture quality, and there is a lot of “wobble” in the captured video, but you can’t beat the price for getting started and testing out the rig. Eventually I will upgrade to a higher resolution camera. The criteria is that it has to be cheap (in case it drops, bangs against rocks on the way to the ground, gets tangled in a helicopter, etc.) and obviously very lightweight. Another desireable feature would be the ability to take still photos at timed intervals.
I’m using a Delta style kite (and my daughter is using a Dora kite), which is easy to fly even when the breeze is not very strong. Ironically, I chose a day that was too breezy and my camera was blowing all over the place. The camera is so light that I think I’ll need to add some weight to anchor it next time out. Ideally, any added weight should be something that could be tweaked depending on just how breezy it is. Fishing weights may be the perfect solution.
I was a bit too ambitious at first. I put heaps of line on my basic reel so that I could to get my kite to fly really high. I payed for it when my hands cramped up trying to reel all of the line back in. Unfortunately, my daughter is too young to help with the reeling back in part, however, she did offer plenty of moral support. Once the aches in my hands and arms subsided, I searched online for better reels, and ended up purchasing a ball-bearing, tangle-proof reel from Amazon for only about ten dollars. It should make reeling in the kite very fast and easy regardless of the height. I’ve already added line to the spool and am excited to give it a try, although it may be quite a while until we have another bout of warm enough weather on the east coast again. I just may have to buy a few more of these reels for my family, because we all know that while everyone loves flying kites, nobody enjoys the reeling in part.
I’m quite excited about this new hobby and learning about how to achieve better results with it. Some things that I plan to do before the next flight include:
Shortening the Picavet sling.
Adding weight to the rig for stabilization.
Researching alternative and more advanced camera options.
Stay tuned for my future flight progress! Next to our development is a polo field, and it would be really neat to capture some aerial video of a polo match this spring. I do, however, have much to learn until then. In the meantime, enjoy these still photos from my inaugural flight:
While my wife and I were getting rid of some old and broken toys, I managed to squirrel away a few things for my toy robot that I hope to someday make. Today’s additions include:
A broken spin-toy. I like the plastic bubble casing, and look, a motor!
A broken face from a kid’s meal toy. I’m eyeing those eyes!
Another spin toy, sans motor. Good robot head potential.
I should probably be on the lookout for some core body parts. Suggestions welcome!

 I waited until the kids were in bed to start on my C3PO banana tattoo. That way I could work uninterrupted. I made the mistake of trying to work on the backside of the banana, which meant I had to constantly turn it and also hold it steady for an eternity with my left hand. As I should have guessed, my hand started cramping up after a short while. Then my phone (which I was using as my time-lapse camera) began ringing, so I conveniently took this as I sign to bail on C3PO and start fresh.